Billing Statements Setup
To configure your statements screen, click Setup in the upper right-hand corner of the Billing/Statements/Reports screen.
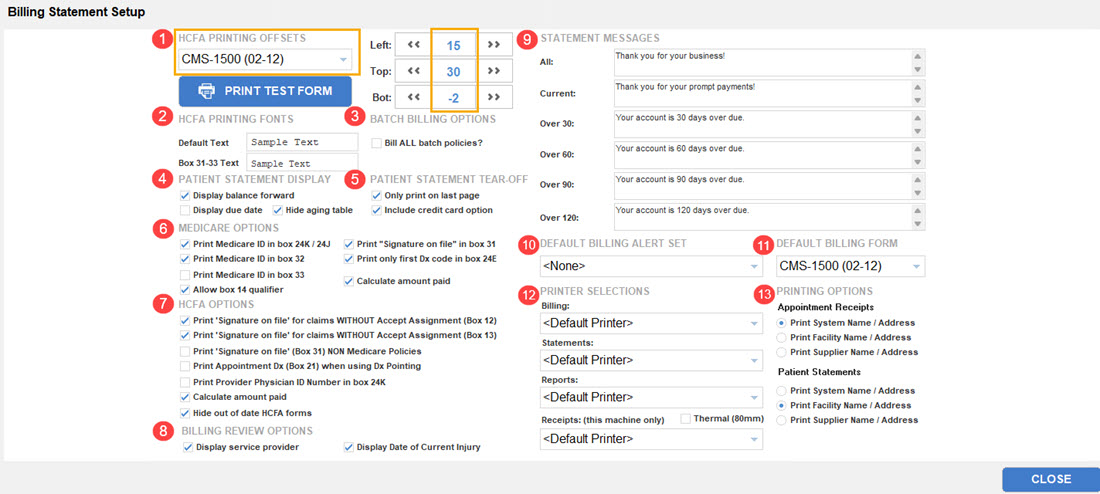
You can set printing offsets, batch billing options, HCFA and Medicare options, statement messages, and printer options.
CMS-1500 (02-12) Settings
- HCFA Printing Offsets – Choose a form from the drop-down menu, and use the left and right arrows to set the printing offsets for the left, top, and bottom of your HCFA forms. To test your settings, place a HCFA form in your printer, and click Print Test Form to check your settings. The most common alignment settings are (Left) 15, Top (30), Bottom (-2).
- HCFA Printing Fonts – You can change your printing fonts by clicking in the text fields. A Font dialog box appears that allows you to select your font face, style, and size.
- Batch Billing Options – Select this checkbox to bill all batch policies simultaneously billing to primary, secondary, and tertiary insurance policies.
- Patient Statement Display – Select options to appear on patient statements.
- Display Balance Forward - Select this checkbox to include the balance forward on patient statements.
- Display Due Date - Select this checkbox to include a due date (today's date plus 30 days) on each patient statement.
- Hide Aging Table - Select this checkbox to hide the aging table located at the bottom of patient statements.
- Patient Statement Tear-off – Select options for the tear-off portion of the patient statement. You can select to print the tear-off only on the last page, and you can select to include an area for the patient to write credit card payment information.
- Medicare Options– Select and unselect checkboxes here to configure how you would like to print Medicare claims.
- Calculate Amount Paid - Check this box to enter all payments made by the patient and other payers relating to charges on the claim in box 29 on the CMS 1500 (02-12) HCFA form. Note: This checkbox affects Medicare claims only.
- HCFA Options – Select and unselect checkboxes here to configure how you would like to print HCFA forms.
- Calculate Amount Paid - Check this box to enter all payments made by the patient and other payers relating to charges on the claim in box 29 on the CMS 1500 (02-12) HCFA form. Note: This checkbox affects all non-Medicare claims.
- Hide out of date HCFA forms - Enabling this option will remove outdated CMS 1500 claim forms as an option in drop down lists within the software.
- Billing Review Options – Select and unselect checkboxes here to configure fields to include on the Charges Waiting to be Billed report. .
- Statement Messages – Use this section to enter messages that you would like to print on your statements.
- All – A message entered here appears on all statements.
- Current – A message entered here only appears on the current statement.
- Over 30, 60, 90, 120 – Messages entered in these fields only appear on statements overdue by 30, 60, 90, or 120 days.
- Default Billing Alert Set – Use the drop-down menu to select a default billing alert set. This alert set is used as the default alert set that is applied to your batch billing. Create your alert sets on the Billing tab of the Billing Statements/Reports screen.
- Default Billing Form – Use the drop-down menu to select your default billing form.
- Printer Selections – Select which printers to use when printing your Bills, Statements, Reports, and Patient Receipts.
- Printing Options – Select whether to print System, Facility, or Supplier name and address on your appointment receipts and patient statements.
Click Exit to return to the Billing Statements/Reports screen.
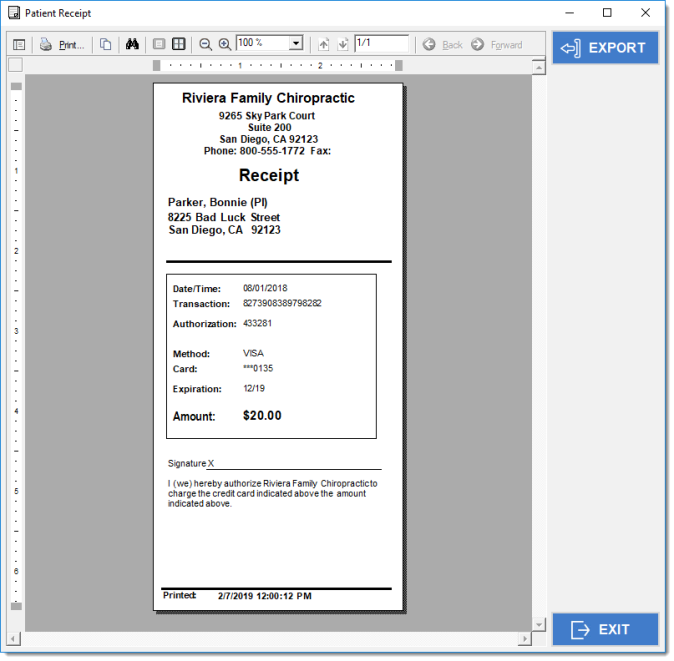
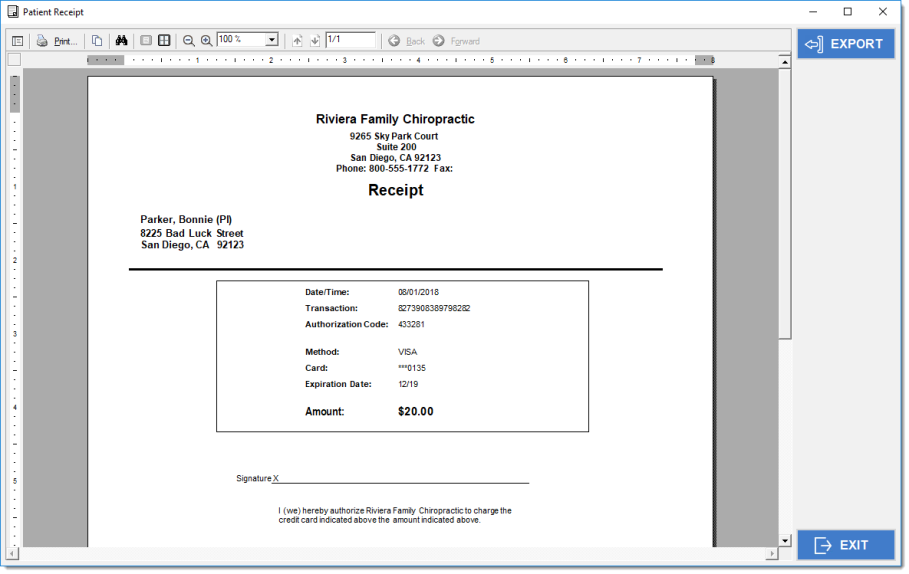
Receipt-Printing Options
Standard Office Printer Option
You can print patient receipts on your default office printer and they will preview as follows:
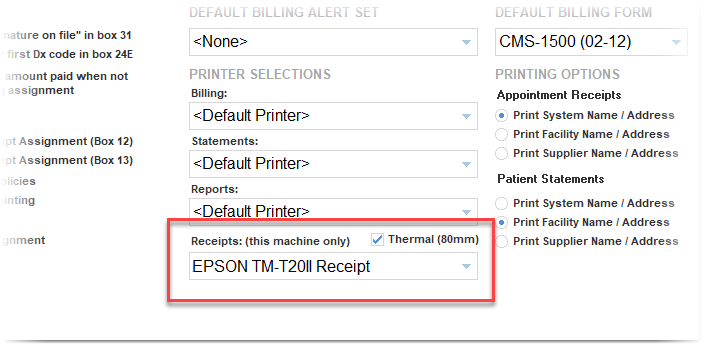
Thermal-Printer Option
Added in Version 7.2.541 is the option to print patient receipts (not appointment receipts) on a thermal 80-millimeter (mm) printer instead of printing on full-sized office paper.
IMPORTANT: This has only tested and approved with an Epson® model TM-T20ii 80-mm printer.
This printer will work as a local printer on your chosen workstation. Once you have installed the thermal printer per the manufacturer's instructions and added it to your list of printers, you can select "Thermal (80mm)" under Printer Selections and use the dropdown to choose the new thermal printer as this workstation's local printer for receipts.
Once the thermal printer is configured, when you select to create a receipt from Transaction Details, you can preview it to see how it will appear in this narrow format.