With the Contact Manager, you can:
- Maintain lists of patients scheduled to be called
- Enter a reason for the call
- Add notes about each call
- Assign calls to staff members
- Run call reports
- Maintain a history of staff calls
- Add patients who miss their appointments to the Contact Manager
- Automatically add patients to the list if they have missed an appointment or have had an appointment within "N" days and have no future appointment.
 Access the Contact Manager
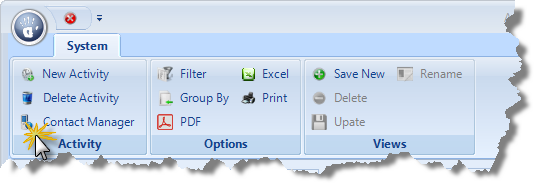
- Click on the Activity Manager icon in the ChiroTouch Launcher.

-
Click the Contact Manager button in the menu ribbon.
Using the Contact Manager
The Contact Manager is designed to provide ultimate ease-of-use for you and your staff, and to eliminate missed appointments and increase patient retention.
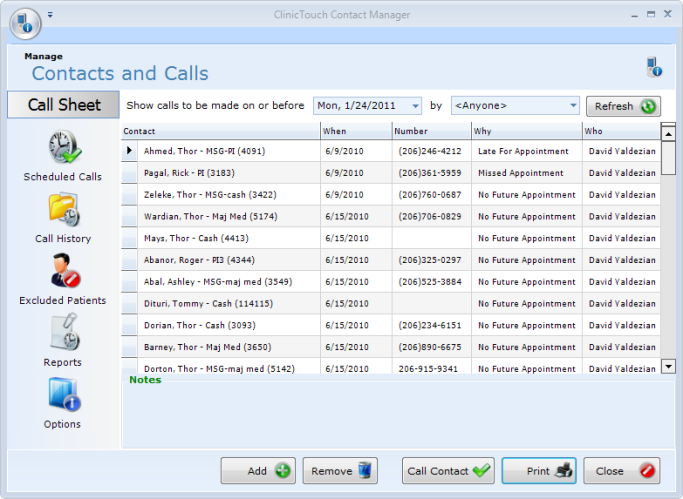
Scheduled Calls
The Contact Manager's main screen is the Scheduled Calls screen. It lists all of the calls scheduled to be made on or before the selected date. Use the Show calls to be made on or before drop-down menu to filter the Contact Manager by date, and the by drop-down menu to filter your list by staff member.
When filtering your lists, be sure to click the Refresh List button after selecting your filter options to refresh the list of calls.
Add a patient to the Contact Manager
- Click the Add button.
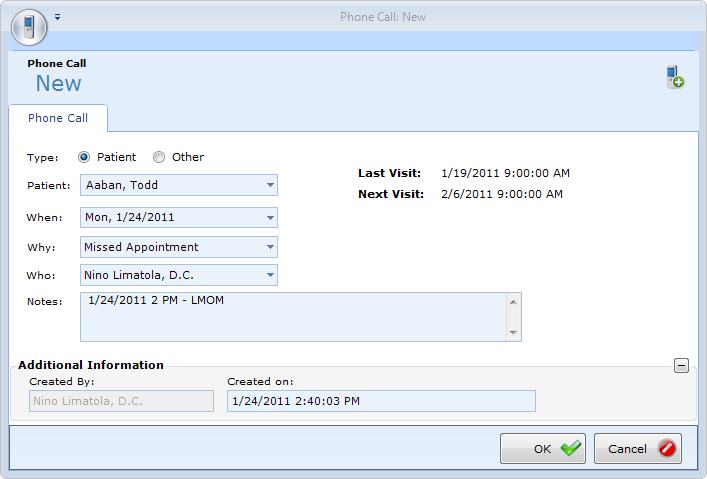
- In the Add Patient Call dialog box, select either the Patient or Other radio button.
- If you select the Patient type, make a selection from the Patient drop-down menu.
- If you select the Other type, enter the contact's name and phone number in the fields provided.
- From the When drop-down menu, select a date to call the patient.
- Select a reason for the call from the Why drop-down menu. These options can be edited in the List Maintenance portion of the ChiroTouch Maintenance application under Call List Reasons.
- Assign a staff member to the call from the Who drop-down menu.
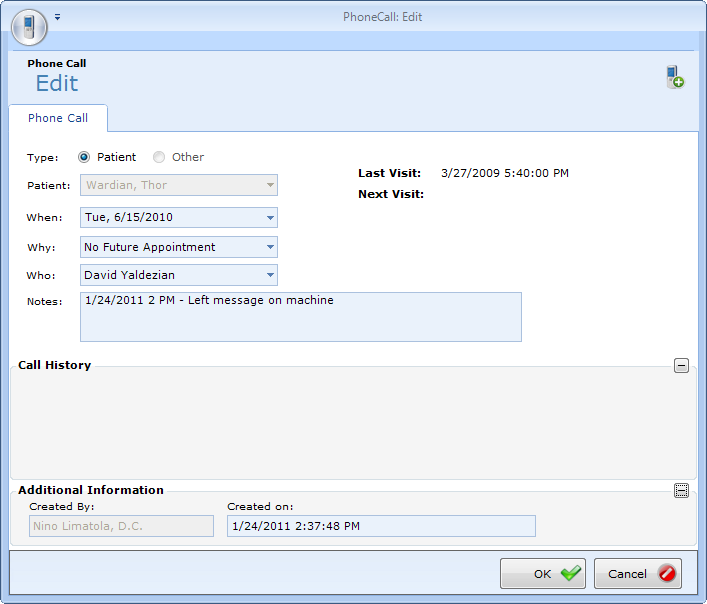
- Add any notes about the call in the Notes field. Bear in mind that there is only one note per patient call history. The Contact Manager does not keep a history of past notes. To keep a history of past notes entered for this patient, add additional notes below current notes and label them with the date they were entered.
- Click the OK button.
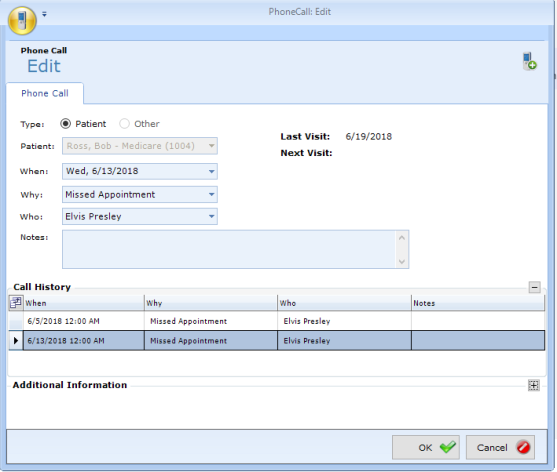
When making a call, select a patient from the list and click the Call Contact button. This dialog box can be used to update the patient's status, reschedule a call, enter notes about the call, view the patient's call history, or remove the patient from the Contact Manager.
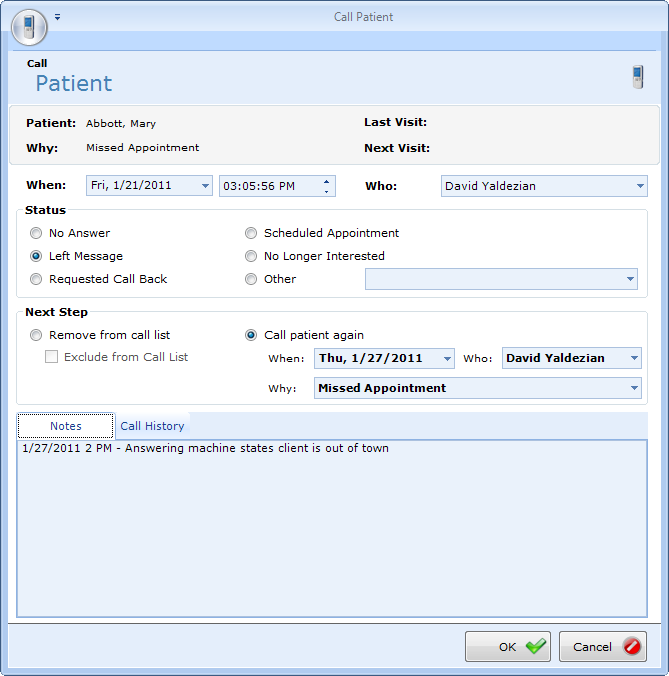
There are a variety of options on this screen for logging call details and designating next steps.
- The upper-most area of this screen lists the patient's name, the reason for the call, the patient's contact numbers, the patient's last appointment, and the patient's next scheduled appointment.
- The next area allows you to select when the call is to be made, and who is making the call.
- The Status area of this screen allows you to log the status of the call. You can also select an alternate status for this call in the Other drop-down menu.
NOTE:
The "Other" list is configurable in the List Maintenance section of the ChiroTouchMaintenance application. To add additional statuses to this "Other" drop-down menu, log into Maintenance, enter the List Maintenance section, and select the "Call List Other Statuses" from the drop-down menu.
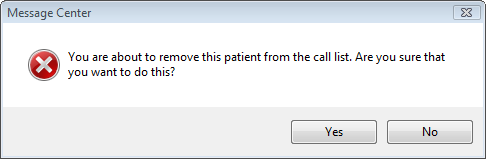
- The Next step area of this screen allows you to schedule the next action to be performed for this patient. You can either choose to remove them from the Contact Manager, or schedule another call to the patient. If you choose to remove the patient from the Contact Manager, you will be prompted to verify that you want to remove this patient.
NOTE:
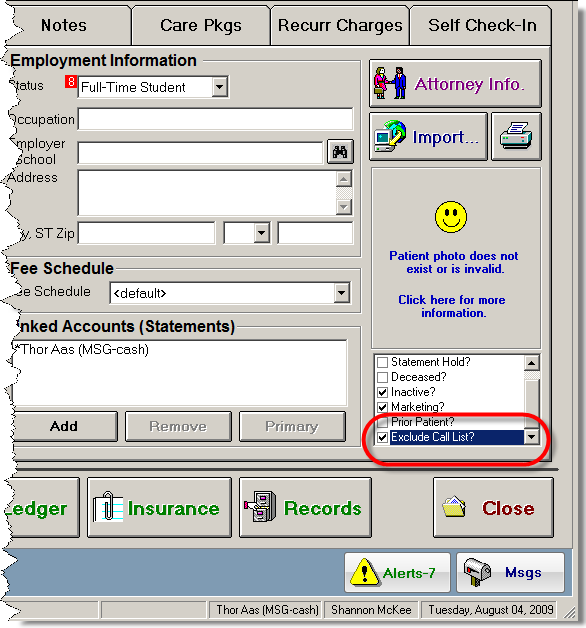
Keep in mind that if you remove a patient from the Contact Manager, the patient will be re-added if they meet the criteria that you set up in Options. To exclude the patient from future calls, select the "Exclude from Call List" checkbox. You can also exclude patients by selecting the "Exclude Call List?" checkbox on the Patient's Information screen.
- Enter additional notes in the Notes field, or click the Call History tab to see details about previous calls to this patient.
Once you have assigned this call a status and next steps, this patient will be removed from the Contact Manager, and will reappear in the Contact Manager on their next scheduled call date.
To edit a scheduled call, double-click the call in the list to bring up the Edit Patient Call dialog box. Here you can edit when the call is scheduled, why it was scheduled, who is assigned to the call, and any notes. Keep in mind that there is only one note per patient, not one note per call.
Call History
The Call History screen allows you to generate a list of all calls made to a patient. Click the Call History button on the left. Select a patient from the Show call history for drop-down list.
Click the Load History button to load this patient's history.
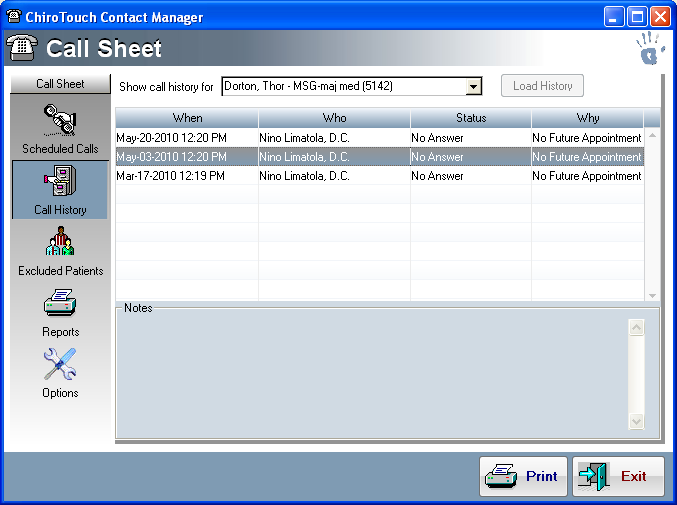
By double-clicking a call you can review and edit the call information, including adding a note. And you can also view the call history for this patient.
Excluded Patients
The Excluded Patients screen allows you to exclude patients from the call list permanently. This deletes the patient's currently scheduled calls and disallows that patient from being added to the call list in the future. To exclude a patient from the call list, click the Excluded Patients button. Select either a single patient, multiple patients, or a block of patients and click the right arrow button to move them into the excluded column.
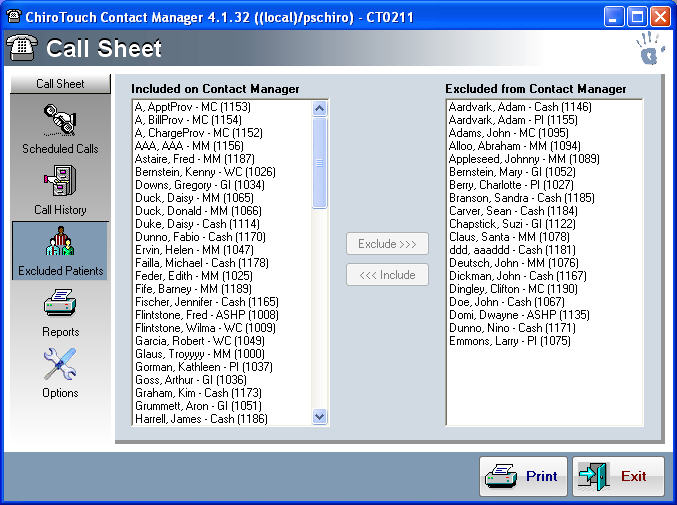
You can print a report of all patients excluded from the call list by clicking the Print button while on this screen.
Reports
The Reports screen allows you generate and print reports right from the Contact Manager. Click the Reports button to view the available reports. The two reports currently available are Scheduled Calls and Staff Call History. Filter these reports by date and staff member.
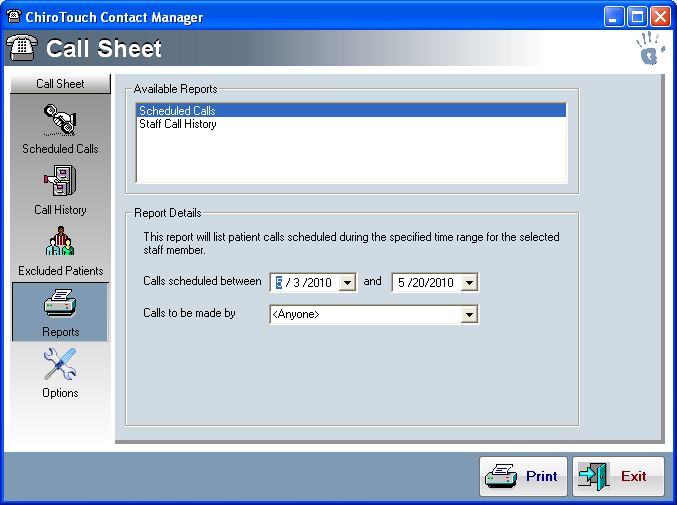
When you have set your filters, click the Print button to bring up the Select Report Destination dialog box. Choose from this dialog box whether to directly print your report, or to preview it. If you choose to preview your report, you will also have the opportunity to export your report from the preview screen.
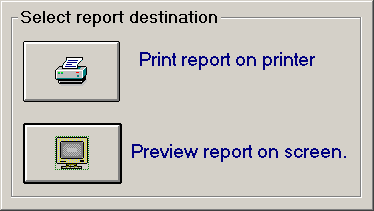
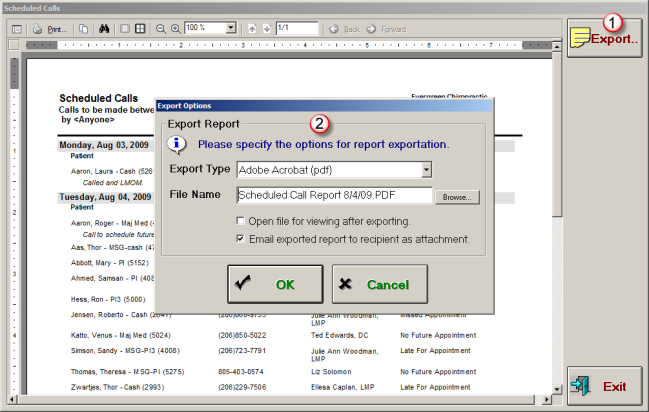
To export your report, click the Preview report on screen button.
 From the preview screen, click the Export button in the top right-hand corner of the screen.
 In the Export Options dialog box, select the type of file you would like to export from the Export Type drop-down menu. These reports can be exported in a Portable Document Format (pdf), An Excel file (xls) format, or a Rich Text file (rtf) format.
Enter a file name in the File Name text box. If you would like to specify a specific directory, click the Browse button and browse to a different folder by clicking the Browse Folders button in the Select file name dialog box.
You can open your file after exporting or e-mail the file using your default e-mail client by selecting the optional Open file for viewing after exporting and/or Email exported report to recipient as attachment checkboxes.
Call Sheet Options
The Options screen enables you to automatically add patients to the Contact Manager who have missed or canceled their appointments, or have no future appointments scheduled.
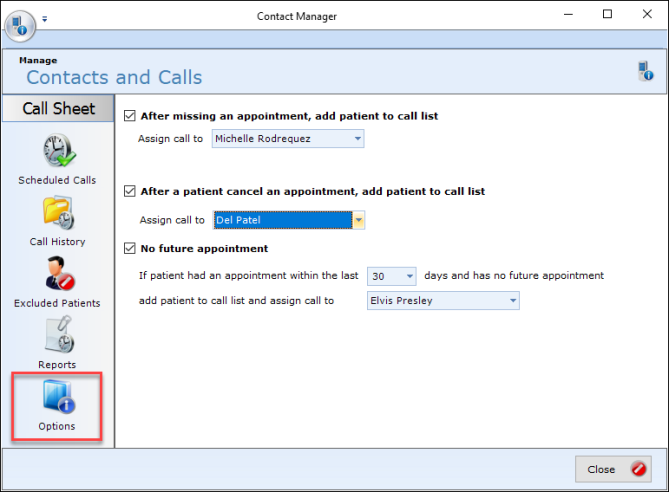
Use these checkboxes to auto-populate the Contact Manager and assign calls to the appropriate staff member based on your office's unique requirements. For the No future appointment option, select patients who had an appointment within a certain number of days and have no future appointment to add them to the Contact Manager and assign their call to a selected staff member.
Remove a Patient from the Call List
There may be times when you would like to block a patient from the call list all together. To block a patient from appearing in the call list:
- Open the ChiroTouch Front Desk application.
- Click the Pat Mgmt button.
- Select a patient from the list and click the Pat Info button.
- Check the Exclude Call List? box. This will exclude this patient from appearing on the Contact Manager. This patient's call history will still be preserved and available for viewing in the call history section of the Contact Manager.