Templates
Every type of InTouch campaign uses a template to generate its messages. You manage these templates from the Templates main screen.
Templates Main Screen
This screen is accessed from anywhere in InTouch by clicking Settings, then Templates.
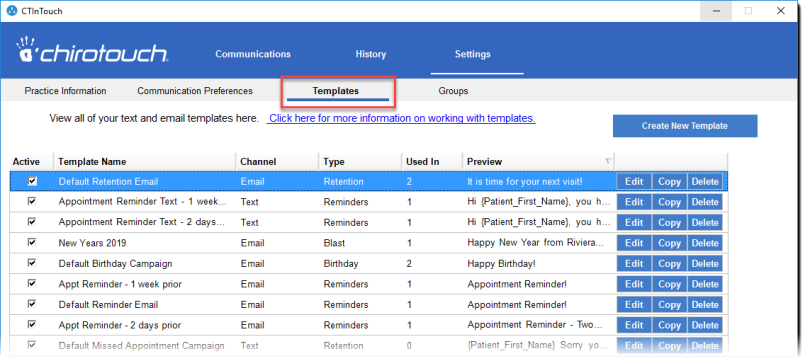
The Templates table lists all the existing templates and shows the following information for each:
- Active/Inactive status
- Template Name
- Channel – whether email or text
- Type – Campaign type
- Used In – the number of campaigns that use this template
- Preview – For email templates this is the subject; for text templates this is the first few characters
For each template there are also three buttons:
- Edit – Open this campaign for editing
- Copy – Open a copy of this template in order to create a new and similar template
- Delete – Delete this campaign
How to Create Templates
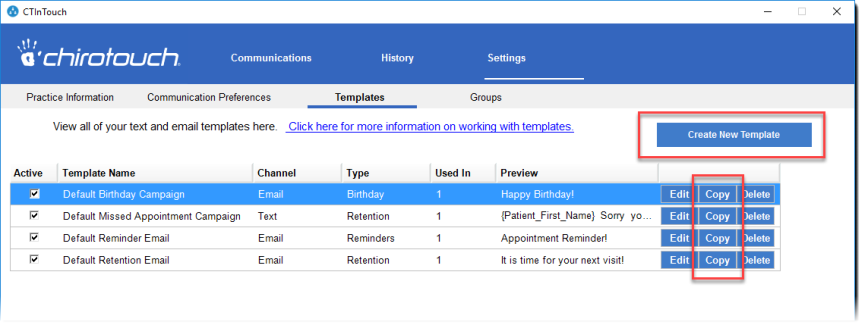
There are three ways to create a new template:
- By clicking Create New Template to create a completely new template. This opens the Create Template form.
- By clicking the Copy button to the right of an existing template. This is best if you want to a head start on creating the template using some pre-existing settings for the new template .
- By clicking a New button in the in any of the campaign creation dialogs.
Email Template Creation – Step by Step
To create a simple email template:
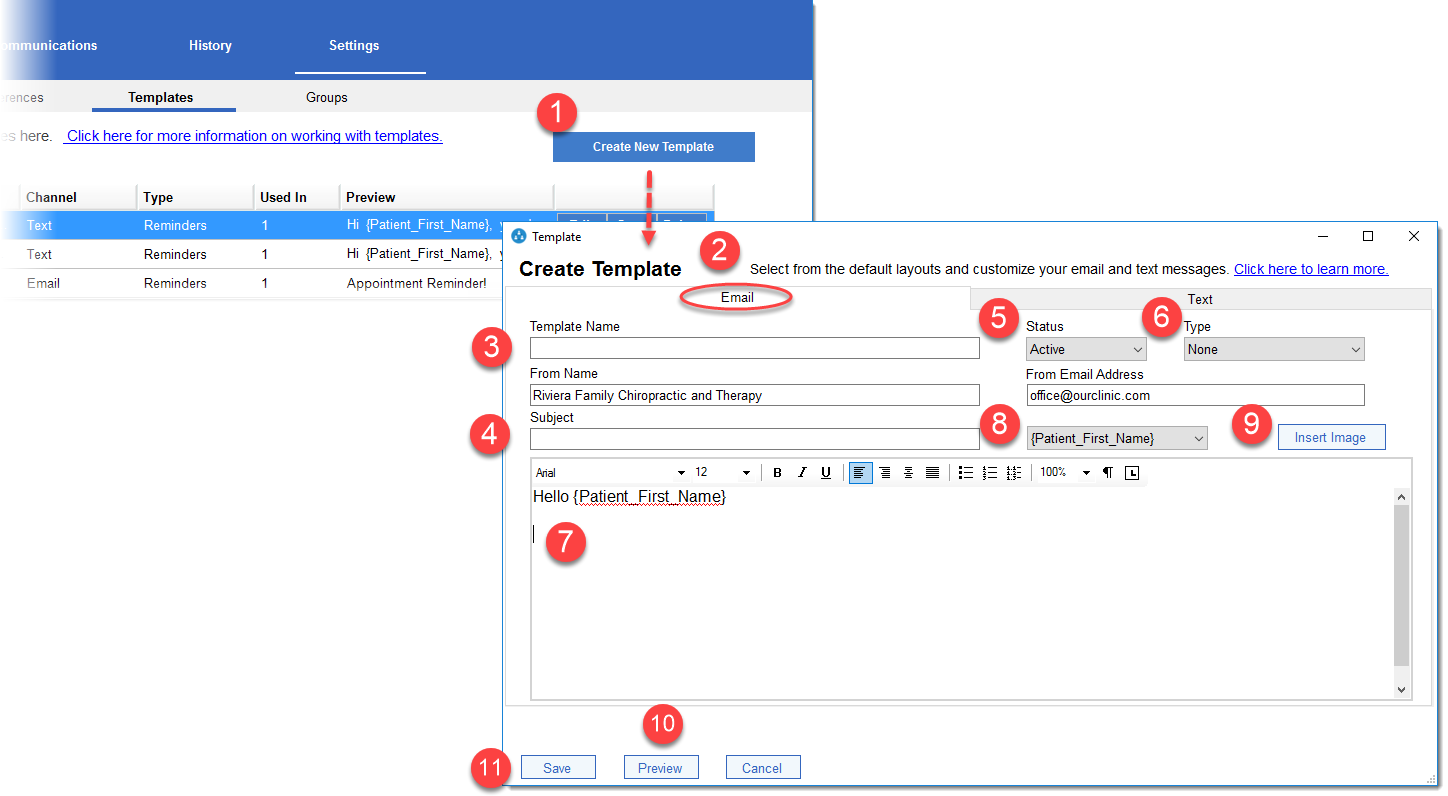
- Click Create New Template to open the Create Template dialog.
Refer to this diagram below for all step-number references: - Select the Email tab.
- Give the template a descriptive name.
- Give the template a subject line that will be applicable on all emails created from the template. For example, "Your appointment is in two days!"
- Set the status to Active.
- Select the template type from the dropdown list. This value will determine in which type of campaign the template will be used: Reminders, Retention, Birthday, or Blast. (If you leave it at "None" you will not be able save this template.)
- Create your email message using any formatting that is appropriate.
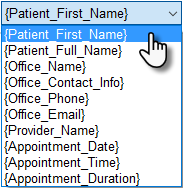
- Use the variables in your message wherever a unique value must appear. Place the cursor in the desired position in the message and select the descriptively named variable from the dropdown list.
- If desired, you can click the Insert Image button to insert an image at the cursor location, such as a company logo or signature into your template.
- Click Preview to see how this template will appear as an email.
- Once you are satisfied with the design of your template, click Save to save the template and close the dialog.
Your new email template will appear in the Templates list.
NOTE: "From" name and email address are values pulled from your Practice Information screen. You can leave them as is, or you can edit them for this template as required.
Inserting an Image into an Email Template
You can insert the image of your choice wherever you place the cursor.
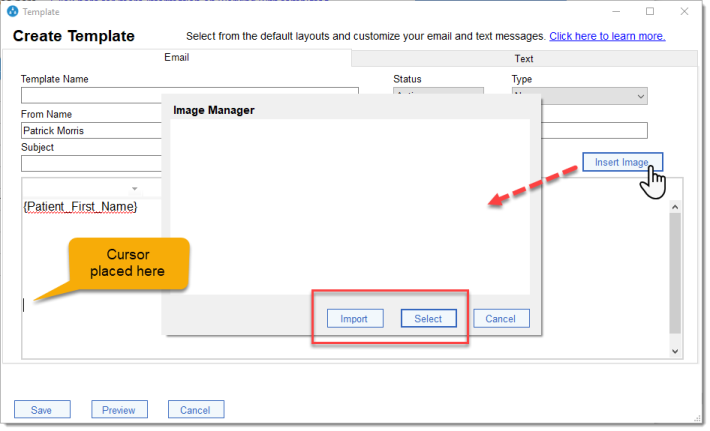
To insert a new image:
All images must be in jpg or jpeg format.
- Place the cursor in the desired location.
- Click Insert Image.
- When the Image Manager appears, click Import.
- An Explorer window will open. Navigate to where your target image is, select it, and click Save.
- When the image file imports, click the image to highlight it in the Image Manager and click Select.
To insert an existing (i.e. already imported) image:
All images must be in jpg or jpeg format.
- Place the cursor in the desired location.
- Click Insert Image.
- When the Image Manager appears, click the image to highlight it and click Select.
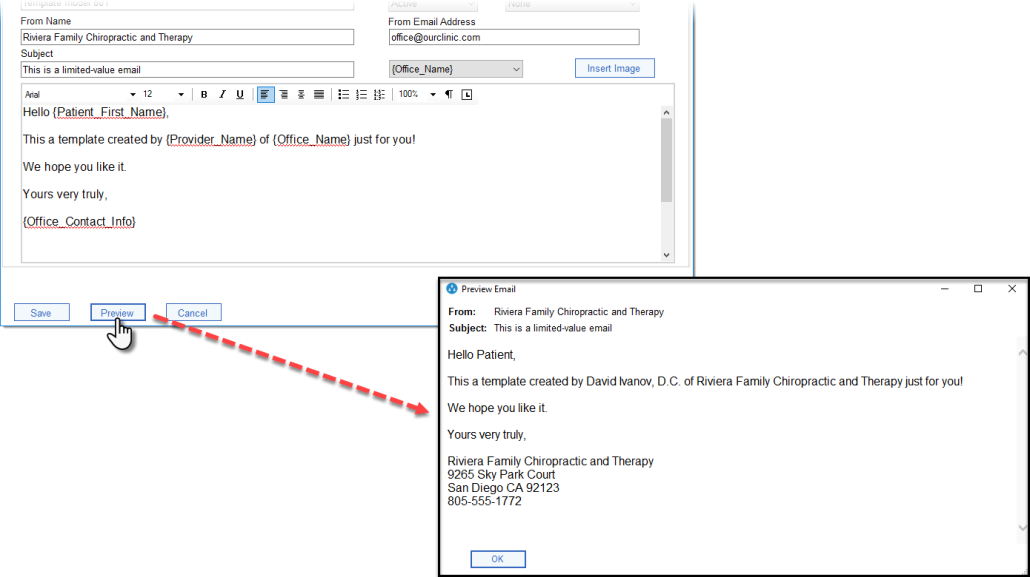
Previewing the Template
Once you have composed your template's message body using the desired variables, you should preview it. Click the Preview button. From the preview you can see how the variables will be replaced in messages with the appropriate data. When finished viewing, click OK to close the preview window. (Template Preview has no test-send capability.)
Text Template Creation
Text template creation is much the same as email creation.
Refer to this diagram below for all step-number references:
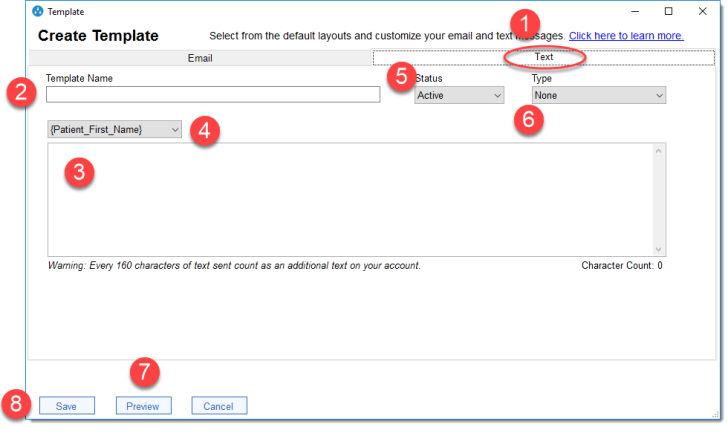
After clicking the Create New Template to open the Create Template dialog:
- Select the "Text" tab.
- Give the template a descriptive name.
- Compose a simple message for the template.
- Use the variables as needed.
- Set status to Active.
- Select the template type from the dropdown list. This value will determine in which type of campaign the template will be used: Reminders, Retention, Birthday, or Blast. (If you leave it at "None" you will not be able save this template.)
- Click Preview to see how this text will appear. When done, close the preview.
- Once you are satisfied with the design of your template, click Save to save the template and close the dialog.
Your new text template will appear in the Templates list.
IMPORTANT: You should only rely on the character counter as a rough guide. It counts the characters in the variables you include. However, their values, e.g. clinic name and office contact information, generated at runtime may be considerably longer and produce a message exceeding the 160-character limit that counts as a single text.
Editing a Template
To begin editing an existing template, click the Edit button to open the Edit Template dialog. Make any changes needed, then click Save to save the changes and close.
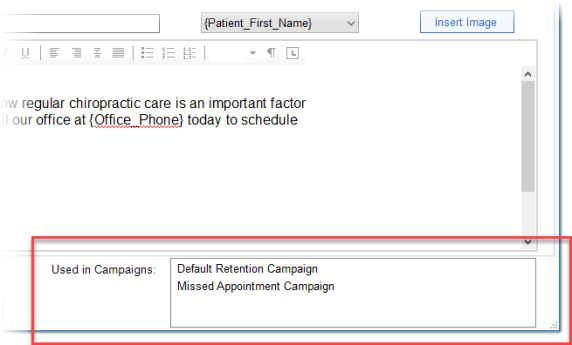
Note that the Edit Template dialog has a section for seeing in which campaigns this template is being used:
Deleting a Template
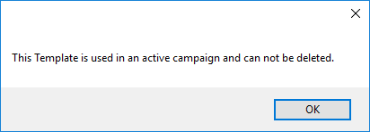
If a template is no longer needed, you can delete it by clicking its Delete button and confirming the deletion.
NOTE: You will not be able to delete a template if it is currently being used in an active campaign. If you attempt to delete it you will see this message: