Modifying a Schedule Book Button
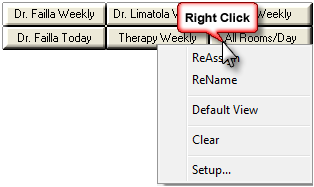
Once you create your schedule book buttons, you can modify these by right-clicking the buttons. You can reassign, rename, or clear a button through this right-click menu.

ReAssign
Select ReAssign to change the button’s assigned view. Any view that you currently have loaded in your work area will then become that button's new assigned view. A pop-up box appears, allowing you to also rename the reassigned view.
Reassigning a button will delete the previously assigned view from the Schedule Book.
ReName
Select ReName to rename your stored view. A pop-up box appears for you to enter the new name.
Default View
Select Default View to set the view as your default view. This view will be loaded automatically when you log in to the application. If no default view is set, the application will display the default view of Day/Providers every time you log in.
You can re-set any button as your default view at any time.
Clear
Select Clear to clear the stored view from this button. Clearing a button will not delete this preferred view entirely. This view remains stored in the Schedule Book for future retrieval.