Recording Audio Files
To expedite the process, new recordings can be created without ever having to use the computer mouse. You can manage most recording functions by using the SPACEBAR, ESC or BACKSPACE keys on the keyboard, thereby speeding up the recording of names and greetings.
Creating a New Recording
- First, determine if your office needs recordings. If you do not plan on creating voice profiles, simply allow the test-to-speech engine to serve as the default voice.
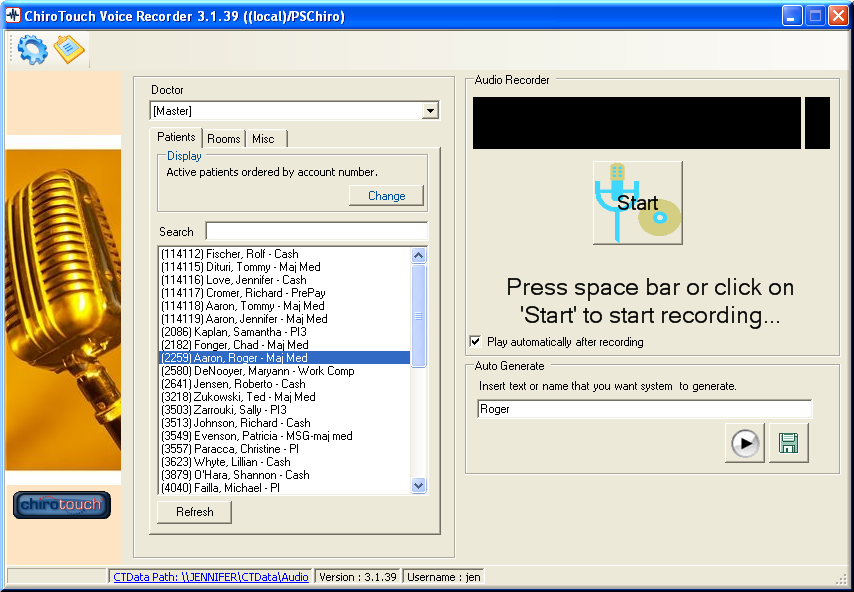
- Select either the master voice record or a specific provider voice record from the drop-down menu.
- Determine what type of audio file to record. The tabs Patient, Room and Misc contain the different recording types. Click on a specific name, room, or miscellaneous greeting. All recording types are created in the same manner.
NOTE:
To maintain HIPAA compliance, record ONLY the patient’s first name.
Preparing to Record Patient Name
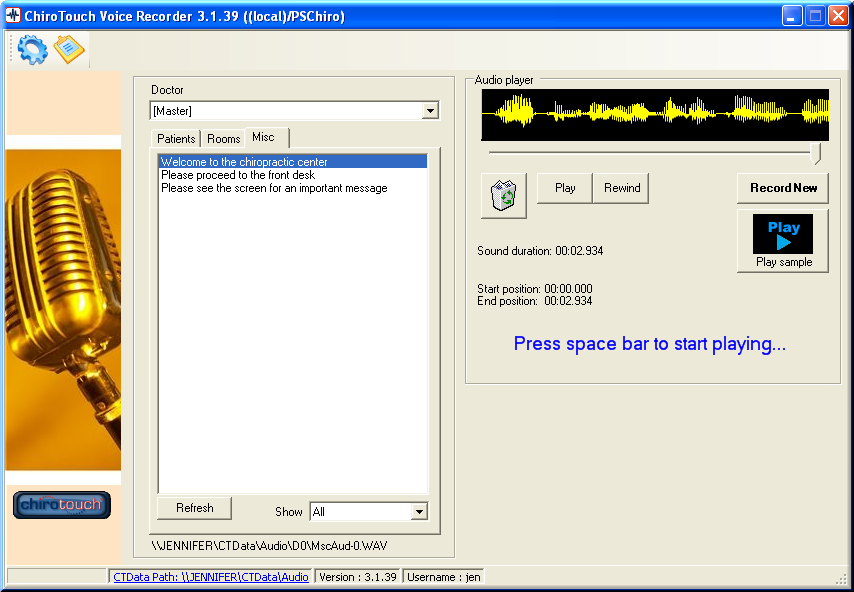
- Follow the directions in the Audio Recorder area on the right side of the screen. Press the SPACEBAR on your keyboard or click the Start button. This action begins the recording.
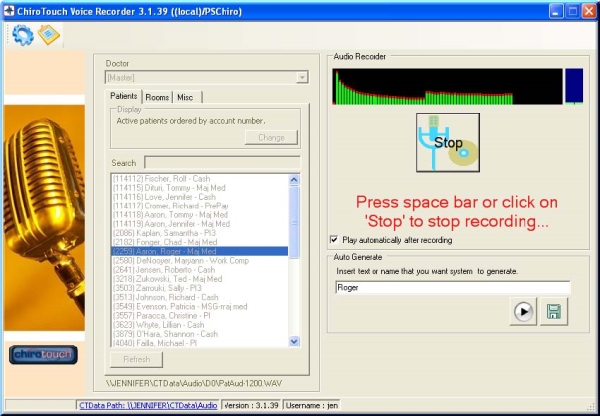
- Speak into your microphone or other recording device immediately after hitting the spacebar. Speak clearly and with an optimistic tone.
- Press the SPACEBAR again immediately after you are done speaking or click the Stop button to stop the recording. Recording in this manner ensures that there are no unnatural pauses in the audio file. Notice how the recording area instructions change as you record.
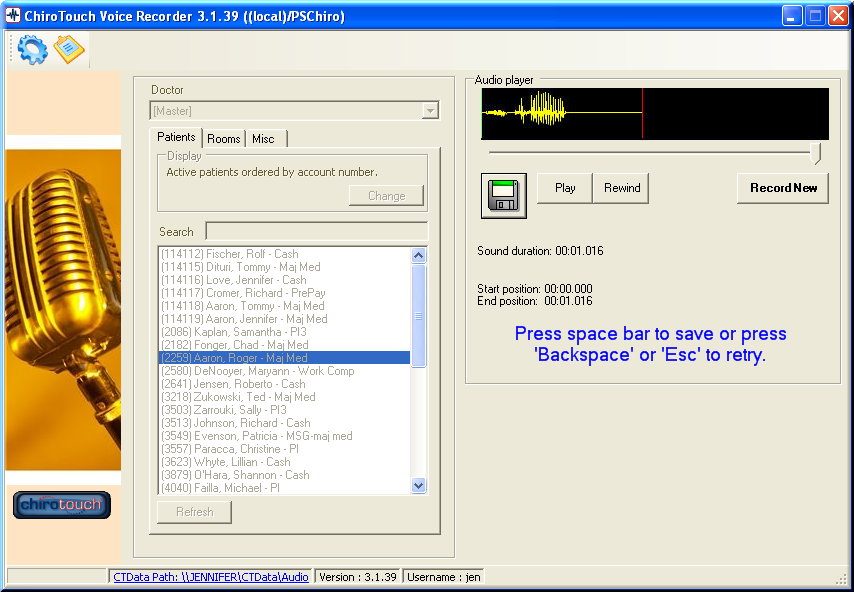
- After stopping, the system automatically plays back the recording. Press the SPACEBAR or click the floppy disk icon button to save the recording. Press the ESC or BACKSPACE keys on your keyboard to retry; the Record New button also allows you to record your name or greeting again. To review the recording, click the Play and Rewind buttons.

- After saving the recording, the right area of the screen changes from Audio Recorder to Audio Player. The floppy disk icon button changes to a trash can icon. Click this button if you need to delete your recording and start over.

The example in the figure above would result in the combined output "Lily, proceed to the acupuncture room".
The new audio file is automatically moved from the Without audio list to the With audio list. The next file in the list is automatically selected to be recorded. Proceed with the recording of patient names, rooms and miscellaneous greetings until the list is gone. Recordings can be created as time allows.
All audio files can be recorded multiple times for different voice profiles. For example, the same patient may have three audio files that correspond to the Master profile, Provider 1, Provider 2, and so on.
Sampling Audio Files
After you have reviewed and saved your files, sample a combination of your files. ChiroTouch takes these audio files and plays them together in your Patient Sign-In Suite applications. In CT Sign-In, the Patient Name audio files are combined with the Miscellaneous Greetings audio files. In CT Announcer, the Patient Name audio files are combined with the Room audio files. Your recordings should be played in combination with each other to make sure they sound appropriate.
It is crucial to sample your audio files, because it allows you to hear how patient audio files play with room recordings and miscellaneous greetings. As CT Voice Recorder replaces your staff’s voice, it represents the office and as such should sound professional.
Sampling your files is necessary for a few reasons. It lets you know if certain files have a long pause before and after the recording that causes an unnatural delay. It is important to speak immediately after you begin a recording and to stop the recording immediately after you are done speaking. Any delays make the sample sound awkward. Playing samples also allows you to confirm the volume settings on your microphone. You can evaluate the consistency in your voice, the tone of your voice, and the clarity of your speech.
To sample your Audio Files:
- Select a patient name, room, or miscellaneous recording.
- Click the Play sample button to play the recording in combination with another recording.

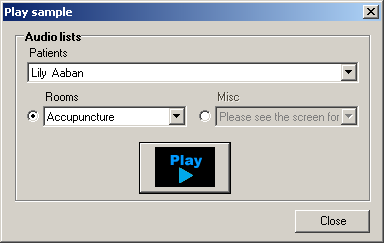
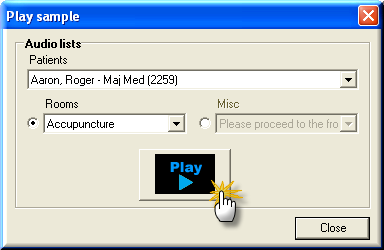
- The Play sample dialog box appears. Use this dialog box to play combinations of samples of patient names with rooms and miscellaneous greetings.
- N O T E
You cannot sample all three recording types together, because the system will not greet and direct a patient in the same announcement. - Select a patient from the drop-down menu.
- Select room or miscellaneous greetings using the radio buttons.
- Select the appropriate item from the drop-down menu.
- Click the Play button to play the combination of a patient’s name with the room or greeting. The sample recording in the figure above should play back as "Roger, please proceed to the acupuncture room". The recording should play smoothly and without delay.