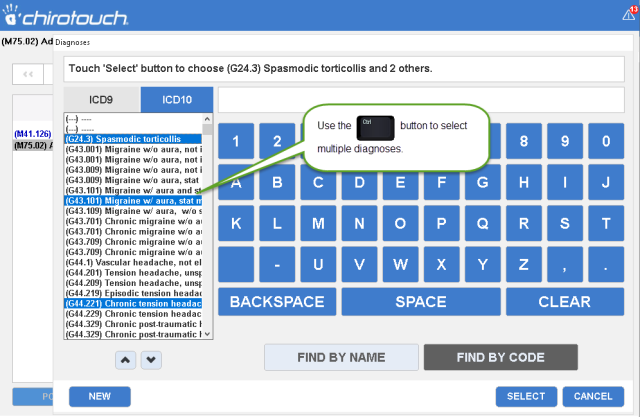
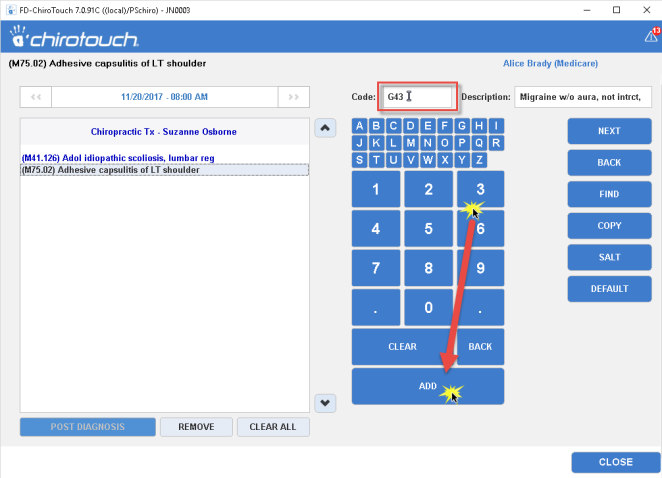
Diagnoses
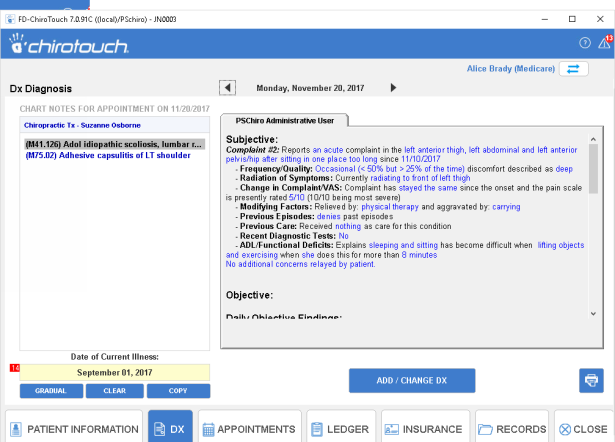
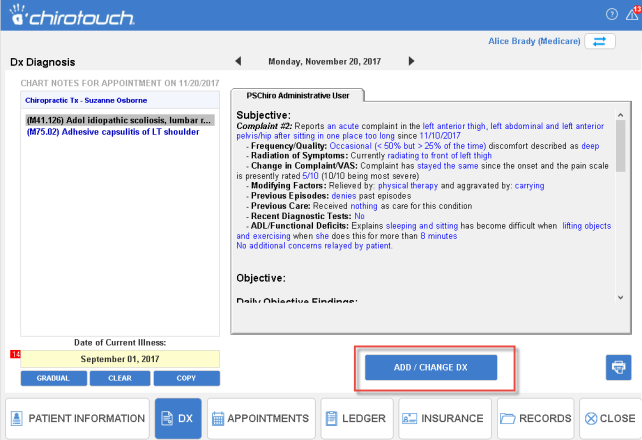
The Diagnoses screen displays all diagnoses and chart notes for a patient, starting with the most recent appointment. This screen is typically used by the front desk staff to assist in questions from an insurance company inquiring about a patient’s condition.
- Open Front Desk.
- Click Patient Mgmt.
- Choose a patient and click Dx.

- Use the arrows to the left and right of the date/time field to view chart notes from a different date.
-
Date of Current Illness refers to the first date of onset of an illness, injury, or pregnancy. This information can be entered here and used for both future appointments and to complete box 14 of your HCFA form.
To select a date of current illness, click in the black field in the Date of Current Illness area and select a date from the popup calendar.

You are asked if you would like to apply this date of illness to all future appointments. Clicking Yes in this dialog box automatically fills in your currently selected date of illness for all future appointments with this patient.
- Click Gradual to set the date of the current illness as evolving gradually over time.
- Click Clear to clear this field and reenter a date.
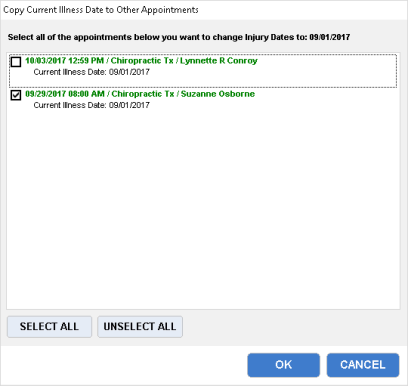
- Click Copy to copy the date of current illness to another appointment or appointments. Check the boxes next to the appointments for which you would like to apply the date of current illness.
- Click Add/Change Dx to open the Diagnoses screen and add or change the current appointment’s diagnoses. Diagnoses for more information on entering diagnoses in this screen.
- Click Close to return to the Patient Management screen.
- Open Front Desk.
- Click Patient Mgmt.
- Choose a patient and click Dx.

- Click Add / Change Dx.
- Locate the diagnosis you want to add.
 See the ways to find and add a code.
- Open Front Desk.
- Click Patient Mgmt.
- Choose a patient and click Dx.

- Click Add / Change Dx.

- Select the diagnosis that you want to remove and click Remove.
You can also use this screen to print your patient's chart notes and diagnoses.
- Open Front Desk.
- Click Patient Mgmt.
- Choose a patient and click Dx.

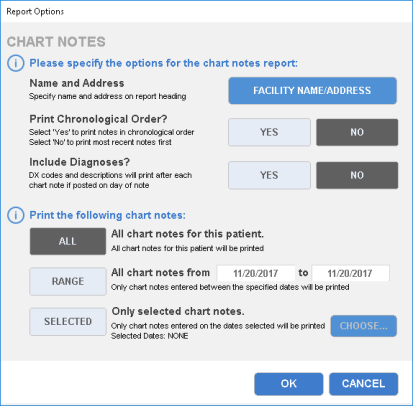
- Click the printer button to open the Report Options dialog box where you can print chart notes and diagnoses for this patient.
- Select the options for printing.
- Name and Address - Click this button to choose between Facility Name Address, System Name/Address, or Supplier Name/Address.
- Print Chronological Order? - Click the "Yes" button to print notes in chronological order, or click No to print the most recent note first.
- Include Diagnosis? - Click the "Yes" button to print diagnoses codes and descriptions after each chart note, or click the "No" button to omit diagnoses codes and descriptions from your report.
- Print the following chart notes - Choose to print all chart notes, a range of chart notes, or only selected chart notes. The date buttons allow selection of your date range. The Choose button allows you to choose particular dates from a list.
- Click OK to print your chart notes.
- Click Close to return to the Patient Management screen.
