Activity Manager
The Activity Manager houses a collection of activities scheduled for all staff members. It allows you and your staff the opportunity to manage daily activities through one comprehensive screen. With the Activity Manager, you can:
- Add and view activities, including tasks, phone calls, faxes, e-mails, and letters
- Enter task-specific information, including: due date, subject, information, duration, status, and the staff member assigned to the activity
- Filter and group activities
- Access the Contact Manager
- Save and print activity lists
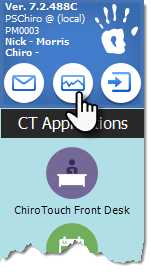
To open the Activity Manager, open the ChiroTouch Launcher and click the" Activity Manager" icon.
The Activity Manager consists of a menu ribbon and view panel. The menu ribbon includes four sections: System, Options, Views, and a section corresponding to the activity currently highlighted in the view panel.
To create a new activity:
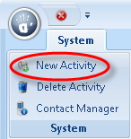
- Click "New Activity" in the ribbon.
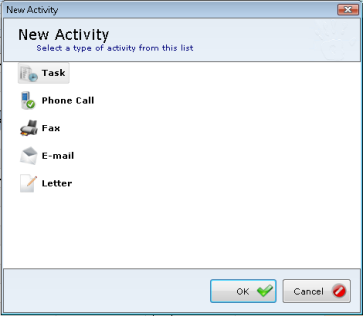
- Select an activity from the list and click "OK". Choose from task, phone call, fax, e-mail, or letter.
Scheduling a New Task
- Click "Task" to schedule a new task and click "OK".
- Select a task type from the "Task Type" drop-down menu.
- Choose when the task should be completed by selecting a date and time in the "When" and "Time" drop-down menus.
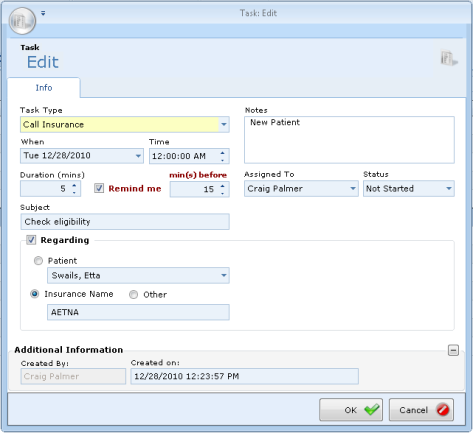
- Select a task duration in the "Duration (mins)" field.
- Select the "Remind Me" checkbox and enter an amount of time in the "min(s) before" drop-down menu to create a ChiroTouch reminder alert for this task. This alert appears in your ChiroTouch system at the specified time before this task is due.
- Select a staff member to assign to this task in the "Assigned To" drop-down menu.
- Enter a subject in the "Subject" line, and select the "Regarding" checkbox to specify a patient or insurance carrier for which this task is related.
- Enter any additional notes for this task in the "Notes" section.
- Click the "Plus" (+) sign to the right of "Additional Information" to add the user who created this task, and timestamp this task with the date and time of entry.
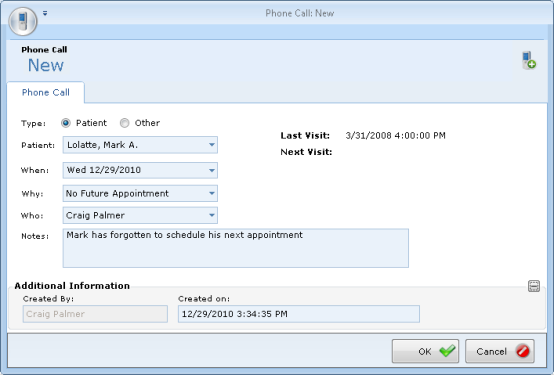
Scheduling a Phone Call
- Click "Phone Call" to schedule a new phone call and click "OK".
- Select a call type by choosing either the "Patient" or "Other" radio button.
- If you choose "Patient", select a patient from the "Patient" drop-down menu.
- If you choose "Other", Enter the name of the contact and their phone number in the "Contact" and "Phone" fields.
- Enter any additional notes. The call reasons listed here are maintained in the "List Maintenance" section of the ChiroTouchMaintenance application.
- Click the "Plus" (+) sign to the right of "Additional Information" to add the user who created this task, and timestamp this task with the date and time of entry.
Scheduling a Fax
- Click "Fax" to schedule a new fax and click "OK".
- Enter a fax number in the Fax # field.
- Select a task duration in the "Duration (mins)" field.
- Select the "Remind Me" checkbox and enter an amount of time in the "min(s) before" drop-down menu to create a ChiroTouch reminder alert for this task. This alert appears in your ChiroTouch system at the specified time before this task is due.
- Enter the subject of this fax.
- Indicate whether this fax is regarding a patient, an insurance carrier, or another recipient. Enter any additional notes, who is responsible for this activity.
- Select the name of the person assigned to complete this activity from the "Assigned To" drop-down menu.
- Click the "Plus" (+) sign to the right of "Additional Information". The name of the user who created this task is displayed, as well as a timestamp with the date and time of creation.

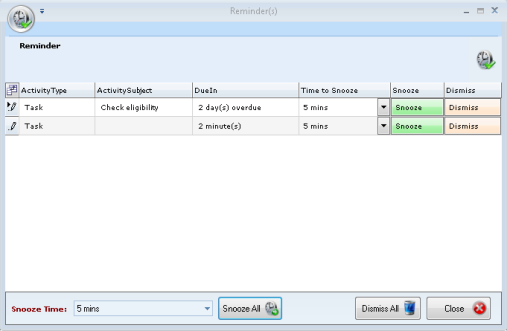
Snoozing an Activity Reminder
To snooze an activity reminder when it appears, select the activity to snooze and click the snooze button. Then select a time duration from the "Time to Snooze" drop-down menu.
To snooze all activities, select a snooze duration from the "Snooze Time" drop-down menu and click the "Snooze All" button.
To dismiss an activity reminder, click the "Dismiss" button. To dismiss all activities, click the "Dismiss All" button.
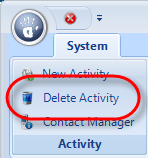
Deleting an Activity
To delete an activity, select the activity in the list and click "Delete Activity".
Filtering Activities
Filter activities by selecting filter options located directly below the menu ribbon. Select options from the drop-down menus to filter by:
- Due date
- Type of activity
- User assigned
- Activity status
- Custom view
![]()
To rearrange the view of the columns, click and drag them to the desired location.
Click the "Filter" button in the menu ribbon to filter your list of activities by specific information. An additional row appears that allows you to filter each column by the information you enter. In this row, you may enter text in any of the columns to filter the column by that information.

Creating a Custom View
Custom views can be used to help users quickly filter activities assigned to them, activities assigned today, or by any other pertinent information.
- Set the filter options that you would like to save as a customized view.
- Click the "Save New" button in the menu ribbon.
- Enter a name for this customized view.

In the view section of the menu ribbon, you may also rename a customized view, delete a customized view, or update a customized view. To do so, first select the view from the "Views" filter row, then select the desired action in the menu ribbon.
Refreshing Data
To manually refresh the data, click the "Refresh Now" link next to the Status drop-down menu.

If the data is up to date, the "Refresh Now" link will be unavailable, and "Up to Date" appears.