How to Create Retention Messages
There are two ways to create a new Retention Campaign:
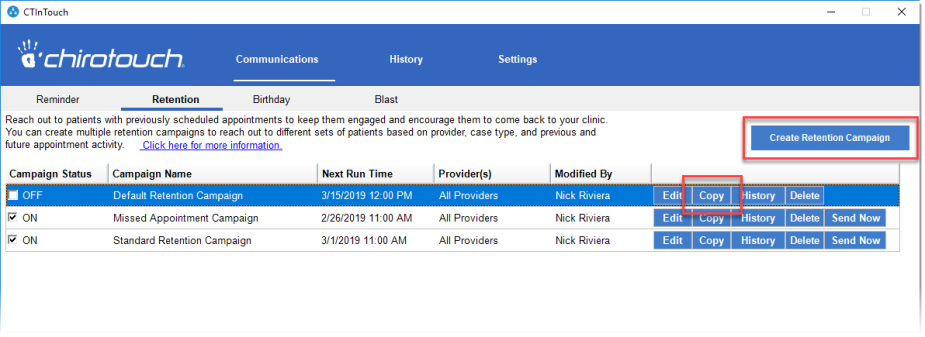
- By clicking Create Retention Campaign to begin a completely new campaign.
- By clicking the Copy button to the right of an existing campaign. This is best if you want to a head start on creating the campaign using some pre-existing settings for an existing campaign that you only need to modify slightly. A good use of this is creating a text campaign from an otherwise identical email campaign, and vice versa.
Retention Campaign – Step By Step
To create a Retention Campaign:
- Click Create Retention Campaign to open the Retention Campaign dialog.
Note: Refer to this diagram for all step-number references below:

- Give your Retention Campaign a descriptive name. For example, "Single-Appt Patient Retention". InTouch accepts long names, so you can generally be as specific as you need to be with naming.
- Set the status to ON or OFF, depending on your schedule for beginning this campaign. Status of ON enables this campaign to run in accordance with the schedule you created; OFF keeps the campaign disabled until you are ready to use it.
- Select which providers for which this campaign should apply. Click Search to display a provider list and select all providers that apply. Then click Save.
- Indicate for which case types this campaign will apply.
- Indicate if this campaign is to be for active patients, inactive patients, or all patients.
- Set up the appointment parameters, described below.
- Set the campaign to send emails and/or text messages. (In this example it is just Email.) From the dropdown, select the template you want to use. (Note that when using InTouch for the first time there will only be one template, the Default Retention Template.)
- Click Preview to see how this email will appear when using the selected template (see below). The default Retention template may prove be sufficient for your needs.
- Editing the template is an optional step. If the default Retention template is not completely sufficient for your campaign message, you can edit the template as needed. See Email Template Editing – a Quick Guide, below.
- Set the day of the week or month for this campaign to run. Set the time of day at which you want to the messages to go out. The range is in half-hour increments from 5:00AM–8:00PM.
- Once you are satisfied with the design of your campaign, click Save to save the campaign and close the dialog.
Your new campaign now appears in the list of Retention Campaigns.
Appointment Parameters
Make selections based on all of the following:
- Appointment latency
- Future-appointment status
- What purpose was the last appointment

Appointment Latency
You can make a selection based on one of the following:
- Last appointment, or
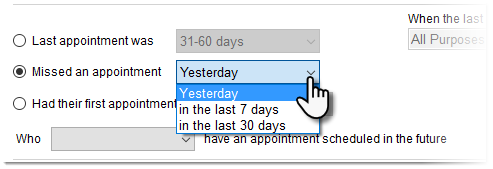
- Missed appointment, or
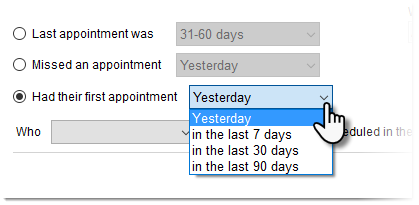
- First appointment
When choosing by last appointment, make your selection based on how long ago was the previous appointment:

When choosing by missed appointment, make your selection based on how long ago was the missed appointment:
When choosing by first appointment, make your selection based on how long ago was the first appointment:
Note that the above choices affect how often the campaign will run (daily, weekly, or monthly):
- Latency of just one day dictates that no day selection will be offered; the campaign will run every day
- Latency of seven days dictates that the campaign will run weekly on the day of the week you specify
- Latency of greater than seven days dictates that the campaign will run monthly on the date you specify
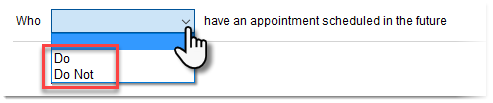
Future-Appointment Status
For this parameter, select for patients who either do or do not have a future appointment scheduled:
Purpose of the Last Visit
Click Search to open the "Purpose of Visit" dialog and select all visit types that should apply to this campaign:
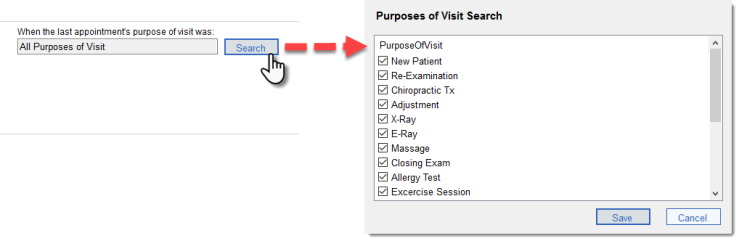
When done, click Save to save the selection(s) and close the dialog.
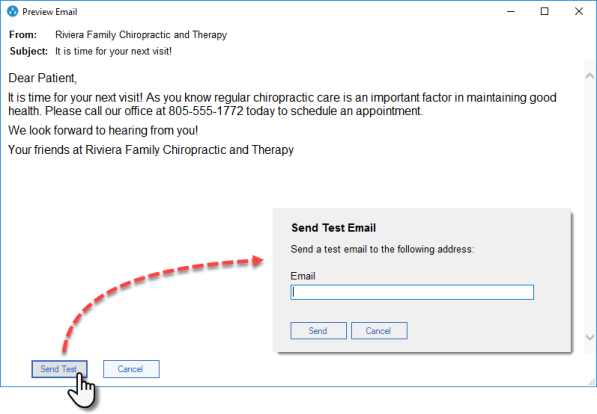
Preview Email
You should preview your messages whenever creating or editing a campaign. You can also take it one step further by sending a test email to yourself. Note that when previewing a message, InTouch substitutes in sample data for some of the variables you are using:
Email Template Editing – a Quick Guide
You can quickly check your selected template as follows:
- Ensure that the basic information is correct: Template Name, From, Subject, and Email address.
- Ensure that the Status is Active.
- Ensure that the Type is set to Retention. This is so the template will be made available for use in Retention campaigns.
- Review the body of the message and make any wording changes necessary. You can also change the style of the wording, font, size, and so forth.
- Use this variables dropdown selection to insert any additional variables necessary. When the email is generated the appropriate values will be swapped in at these locations.
- If you would like an image in the emails, such as your company logo, to appear, place the cursor where you want the image to go and click Insert Image.
- Once finished, click Preview to preview the results. If you have made changes and you're satisfied with the new look, click Save.