Treatment Notes
To enter treatment notes for your patients, click the "Tx Notes" button on the Patient Search screen.

Use this section of the Provider application to add virtual “sticky notes” to your patient’s account. Notes added in this screen are viewable here on every future visit for this patient until the notes are deleted.
NOTE:
Use this screen to log and view your treatment notes. These notes are not alerts, and do not pop up when a patient is selected.
There are three sections on this screen. By default, these sections are labeled "Chiropractic Tx Notes", "Therapy Notes", and "Contraindication". You can configure the section headings to reflect different types of notes. Choosing Diagnoses or Insurance for section headings auto-populates these sections with the patient's last visit diagnoses, or their insurance information, respectively.
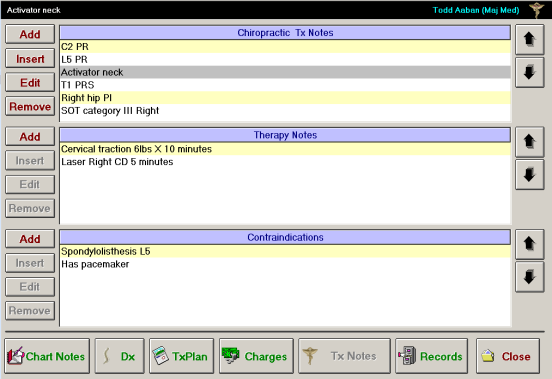
Clicking "Add" button and entering a treatment note adds the note to the top of the notes list within that section. Use the "Insert" button to insert a note into a selected location within the note list.
To add a treatment note:
- Click the "Add" button beside one of the three section headings. An Enter a new value dialog box appears.
- Enter a new treatment note to add to this section.
- Click the "OK" button to add this treatment note.
To insert a treatment note:
- Highlight a note in the list.
- Click the "Insert" button. The "Insert" button inserts your new note above the highlighted note. An Enter a new value dialog box appears.
- Enter a new treatment note to add to this section.
- Click the "OK" button to add this treatment note.
To edit a treatment note:
- Highlight a note in the list.
- Click the "Edit" button. An Enter a new value dialog box appears.
- Edit the treatment note text.
- Click the "OK" button.
To remove a treatment note:
- Highlight a note in the list.
- Click the "Remove" button. A confirmation dialog box appears.
- Click the "Yes" button to permanently remove this treatment note.