Images
The Images / Records section gives you access to your patients’ entire records, system documents and digital images. This section gives you a quick reference of the digital images located in the current patient's file. Any .jpg digital image can be displayed here.
NOTE: NOTE: Only .jpg images can be displayed in the Provider All-in-One app. We highly suggest when possible to save all images as .jpg images.

The Images section offers the following tools:
- Onscreen display of up to 18 images
- Editing images
- Full screen, side by side image viewing
- Move and sort order of images
- Select new images from the patient’s electronic records
Multiple Pages of Images
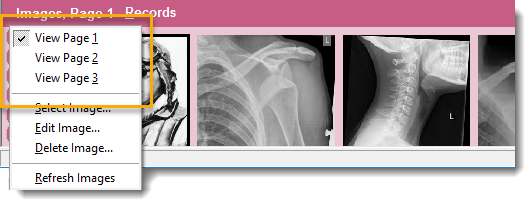
Three are three pages of patient images that you can access by clicking the "Images" header.
Imaging Tools
The left column contains buttons to manage your imaging tools. Using any of these buttons will affect the image that you select. Clicking an image will mark it as selected to view and/or edit, and it will highlight the surrounding area in yellow.
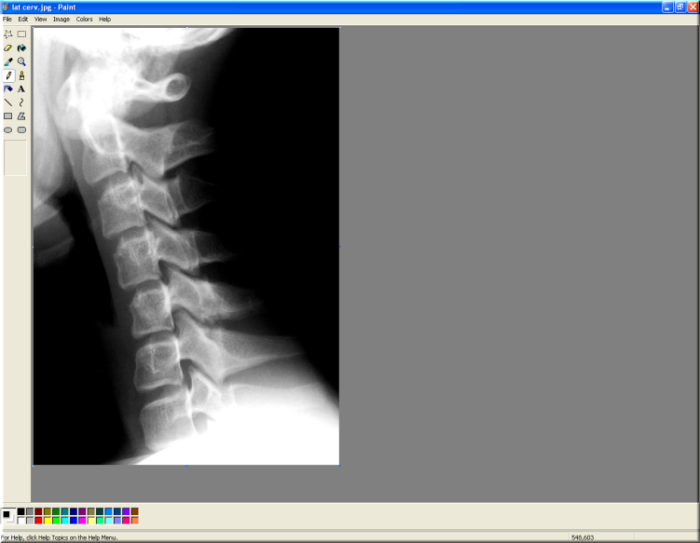
Use the Edit button to edit your images on the screen. This tool allows you to mark the image and thus indicate areas of concern and/or improvement. The image will open in your computer’s default graphics painting program, such as Microsoft Paint. If you prefer to use alternative graphics programs, such as Adobe Photoshop, you can set any program as your default graphics painting program through your computer’s settings.
- Select the image that you want to edit.
- Click the Edit button.
- The image will open in your computer’s graphics painting program.
- Edit the image to your liking using painting tools.
- Save the new image to an appropriate folder on your computer. The new image can then be imported into the patient’s electronic records to display in the Images section.
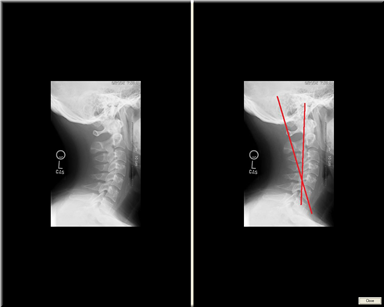
Images can be conveniently shared with your patient in the privacy of the treatment room. You can even compare these images side by side. View a single image by double-clicking it to open it in its associated picture viewing program, or use one of the View buttons to the left of the image display.
View
To view a single image, select the image you would like to view and then click the “View” button. The selected image will open in a separate preview window on your screen. Click the “Close” button to exit the preview window.
Compare >
This function compares a selected image with the image directly to its right. The images will be displayed side by side in a preview window.
< Compare
This function is similar to the above ,but it compares a selected image with the image directly to its left. The images will be displayed side by side on the screen.
You can move the images and sort them in any order. Highlight an image and use the Move buttons to sort the order of the images. Use the Move > and < Move buttons to move the image to the right or left. Note that this function works across the three image pages. For example you can push an image off of page 1 onto page 2, or vice versa, using this tool.
And Move can be used to place any two images together you would want to compare using the Compare functions.
You can replace the images with new images, as long as the images are stored in the patient’s electronic file.
To select a new image:
- Select the image that you want to replace.
- Go to Images > Select Image.
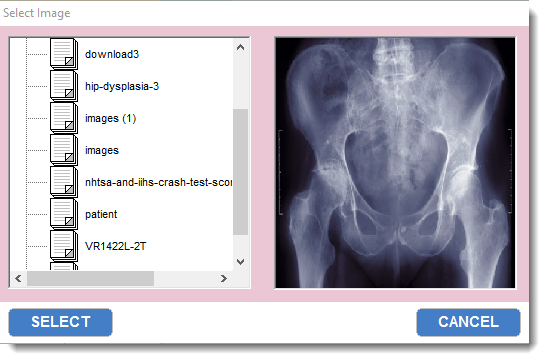
- All of your .JPG image files are listed to the left in the Select Image dialog box. Click on an image to preview it on the right.
- Click the Select button to replace and/or add the new image to the Images section. Click the Close button to cancel the image selection.
Additional options can be found in the Images drop-down menu.
- The Edit Image option acts the same as the Edit button and will allow you to edit the image using your computer’s image editing program.
- The Delete Image option simply allows you to delete a selected image.
- The Refresh Image option will refresh the section with any new image versions that have been overwritten to the existing image file.
 Editing Images