Chart Notes
Tap the Chart Notes window to open the Chart Notes Editor. The settings in the iPad app mirror those you set in the CT Provider desktop application.
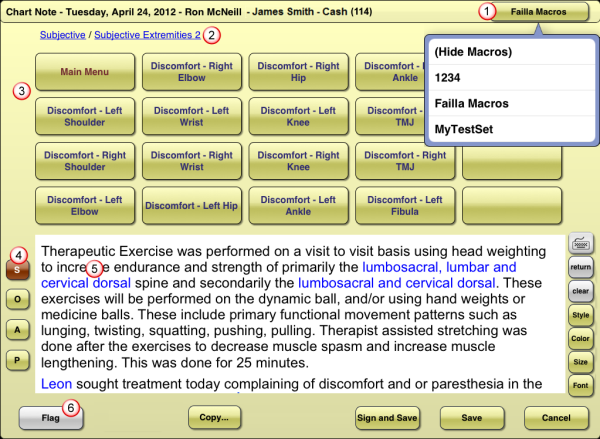
![]() Tap the macro set button in the upper-right corner to switch macro sets or to hide macro buttons.
Tap the macro set button in the upper-right corner to switch macro sets or to hide macro buttons.
![]() Macro breadcrumb navigation links appear above the macro buttons. Tap any link to go quickly to that menu.
Macro breadcrumb navigation links appear above the macro buttons. Tap any link to go quickly to that menu.
![]() Macro menu buttons appear with red text, while macro text buttons appear with blue text. Tap a macro text button to enter the macro text in your chart note. To hide the macro buttons, tap the macro set button in the upper-right corner and select (Hide Macros). A return is automatically added when you insert a macro, but if you would like this system option turned off, please contact Support at 619-528-0040. Tap return to enter a return without bringing up the keyboard. Tap the clear button to clear the entire text field in that chart note section.
Macro menu buttons appear with red text, while macro text buttons appear with blue text. Tap a macro text button to enter the macro text in your chart note. To hide the macro buttons, tap the macro set button in the upper-right corner and select (Hide Macros). A return is automatically added when you insert a macro, but if you would like this system option turned off, please contact Support at 619-528-0040. Tap return to enter a return without bringing up the keyboard. Tap the clear button to clear the entire text field in that chart note section.
![]() When entering a SOAP note, the SOAP buttons appear to the left of the chart note text field. Tap the buttons to switch between Subjective, Objective, Assessment, or Plan.
When entering a SOAP note, the SOAP buttons appear to the left of the chart note text field. Tap the buttons to switch between Subjective, Objective, Assessment, or Plan.
![]() Tap on the blue text of a macro question to view the question's dialog box and edit your selections.
Tap on the blue text of a macro question to view the question's dialog box and edit your selections.
![]() To flag your notes, tap Flag to view colors. Tap a color to flag your note with that color. The Flag button appears shaded with the color you selected and the chart note appears in the chart note list shaded with that color.
To flag your notes, tap Flag to view colors. Tap a color to flag your note with that color. The Flag button appears shaded with the color you selected and the chart note appears in the chart note list shaded with that color.
Floating subjectives allow patient self check-in subjectives to be used by any provider. This allows providers to use the subjective even if they are not the appointment provider.
To use floating subjectives, you must enable the option in the Maintenance application. You must be using ChiroTouch version 5.3.48 or higher.
Enable floating subjectives
- Open ChiroTouch Maintenance.
- Click Options.
- Select the Allow patient self check-in subjective to be used by any provider option.
Once a patient fills out a subjective at self check-in, it will be available to any provider viewing the patient's file. When you open the Chart Note editor, you will be alerted that the patient has a subjective available and you will be given the option to insert it: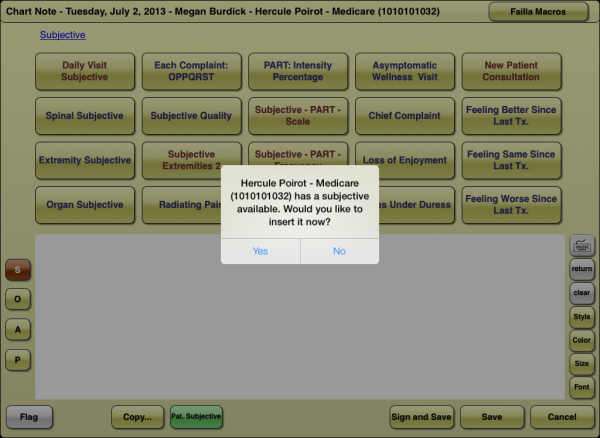
Tap Yes to insert the subjective data into the chart note. If you are using a single note, it will be inserted at the top. If you are using a SOAP note, it will be entered in the Subjective portion.
Tap No to open the Chart Note Editor without using the subjective data. You will still be able to insert the data at a later time.
NOTE:
Floating subjectives are available to providers for 3 days after being filled out, regardless of whether they have been inserted into a provider's chart notes.
If a patient subjective is available when using the Chart Note Editor, you will see a Pat. Subjective button in the lower section of the Chart Note Editor.
Tap Pat. Subjective to insert the subjective data into the chart note.
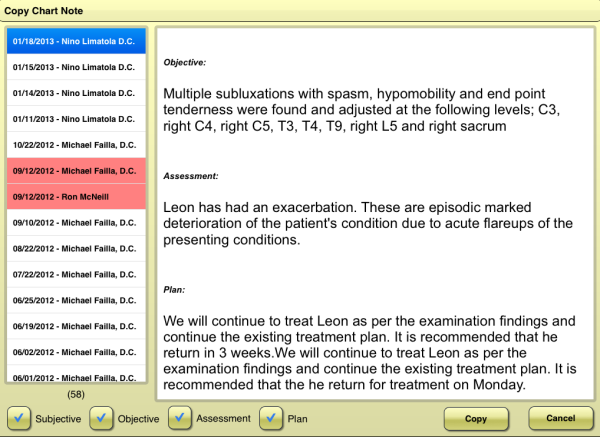
You can copy a previous chart note into your current chart note.
Tap Copy... to copy a previous chart note into your current chart note. Select the date of the chart note from the chart note list, and then select the portions you wish to copy (Subjective, Objective, Assessment, or Plan). Then tap Copy.
When you tap a macro text button that contains a command, the command dialog box appears. These macros can be configured in the Provider All-In-One desktop application.
Ask - This command prompts you to type an answer to a question. The keyboard is displayed automatically. Type the answer to the question, and then tap Next to enter the answer in the chart note.
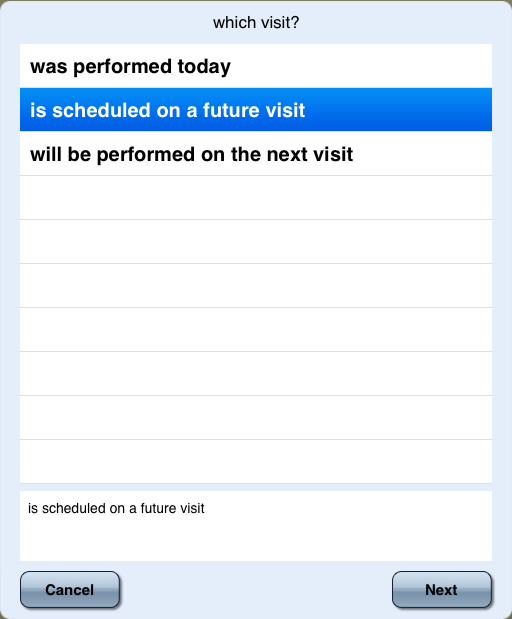
Choose One - This command prompts you to select an answer to a question. Select an answer from the list. To edit the text, tap the text field to display the keyboard. Tap Next to enter the answer in the chart note.
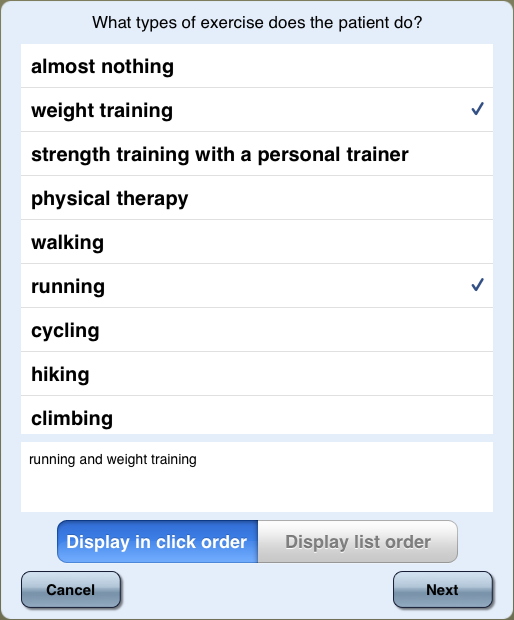
Choose Any - This command prompts you with a multiple choice question. Select multiple answers for the "Choose Any" command; check marks appears on the right of your selections. To edit the text, tap the text field to display the keyboard. Tap Next to enter the answers in the chart note.
Date - This command prompts you for a date and displays the date wheel scroller. Select a date, and then tap Next to enter the selection in the chart note.
Number - This command prompts you for a number and displays a number pad. Tap the number buttons to enter a number. Tap Backspace to clear one digit, or tap Clear to clear the entire number. Tap Next to enter the number in the chart note.
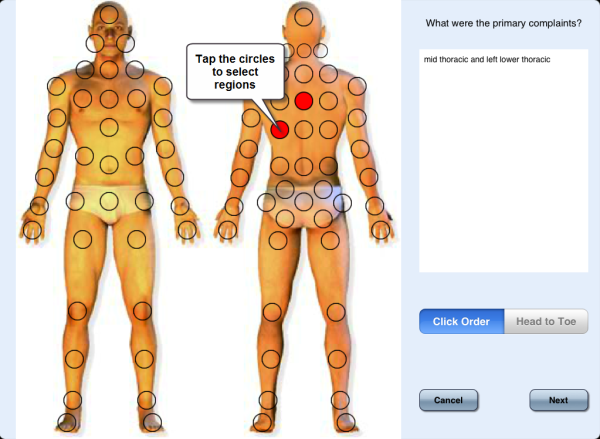
Region - This command prompts you to enter regions of the body.
- Tap the circles to select regions. To edit the text of a region, tap the text field to display the keyboard.
- Tap Click Order to display your selections in the order you selected them, or tap Head to Toe to display your selections in order from head to toe.
- Tap Next to enter your selections in the chart note.
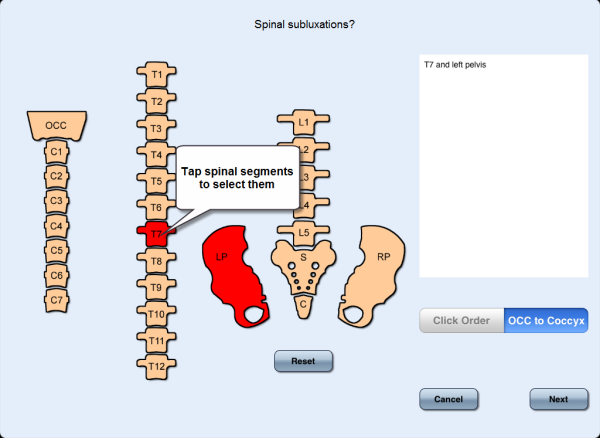
Spine - This command prompts you to select spine segments.
- Tap the spine segments to make your selections. Your selections appears red. To edit the text of a region, tap the text field to display the keyboard.
- To clear a selection, tap it again.
- Tap Reset to clear all selections.
- Tap Click Order to display your selections in the order you selected them, or tap OCC to Coccyx to display your selections in order from OCC to coccyx.
- Tap Next to enter your selections in the chart note.
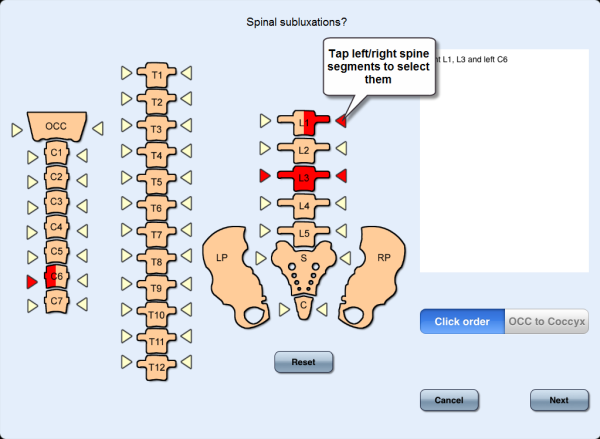
Spine L-R - This command is similar to the Spine command but allows for more precision. It prompts you for a left, right, or complete spine segment.
- Tap the arrows on the left or right of a spine segment to make your selections. Your selections appears red. To edit the text of a region, tap the text field to display the keyboard.
- To clear a selection, tap it again.
- Tap Reset to clear all selections.
- Tap Click Order to display your selections in the order you selected them, or tap OCC to Coccyx to display your selections in order from OCC to coccyx.
- Tap Next to enter your selections in the chart note.
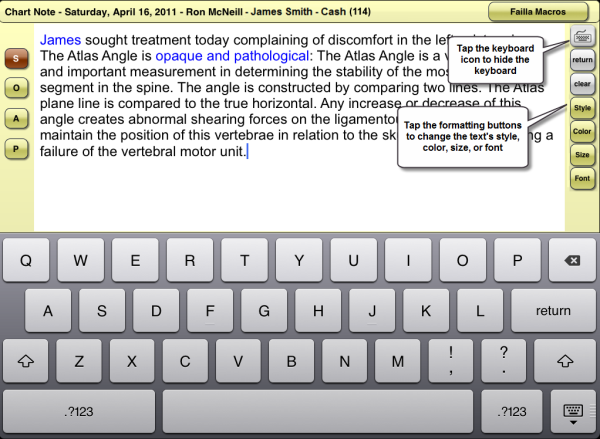
Tap ![]() to view the keyboard. Tap the formatting buttons on the right to format your text. Tap return to enter a return without bringing up the keyboard. This makes it easy to enter multiple macros. Tap clear to clear the entire text field in that chart note section.
to view the keyboard. Tap the formatting buttons on the right to format your text. Tap return to enter a return without bringing up the keyboard. This makes it easy to enter multiple macros. Tap clear to clear the entire text field in that chart note section.
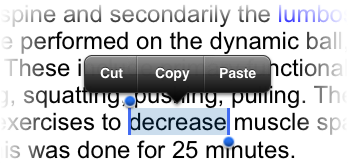
To select text for cutting, copying, or formatting:
- Press and hold a word or anywhere in the text field to view selection options.
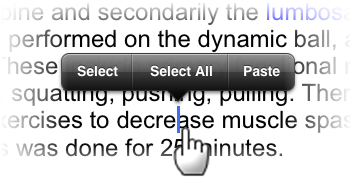
- Tap Select or Select All.
- Drag the cursors left or right to adjust the selection. You can then cut, copy, or format the highlighted text.
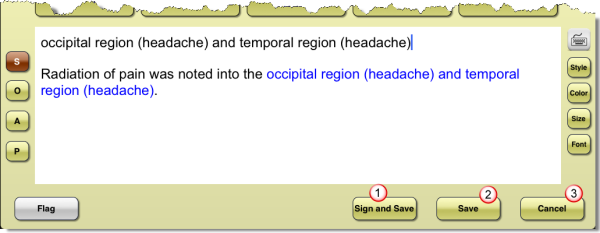
![]() Tap Sign and Save to sign and save your chart note. The Signing Option dialog box appears.
Tap Sign and Save to sign and save your chart note. The Signing Option dialog box appears.
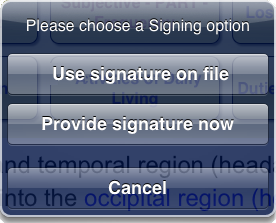
- Select Use signature on file to use a signature stored on file. You can use this option if you have already stored a signature using the CT Provider desktop application.
The Login dialog box appears. Type your user name and password, and then tap Save. The signature timestamp will be entered in the chart note, and the chart notes list appears.
- Select Provide signature now to draw a new signature. The signature box appears. Draw your signature in the signature box.
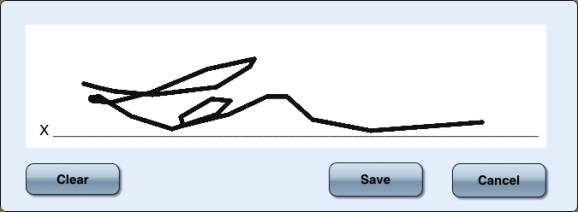
- Tap Clear to clear the signature.
- Tap Save to save your signature. A signature timestamp will be inserted in the chart note and the chart notes list appears.
- Tap Cancel to return to your chart note without saving.
![]() Tap Save to save your chart note without signing it.
Tap Save to save your chart note without signing it.
![]() Tap Cancel to return to the chart notes list without saving the chart note.
Tap Cancel to return to the chart notes list without saving the chart note.
Tap the top of the Chart Notes window to view a list of your chart notes by date.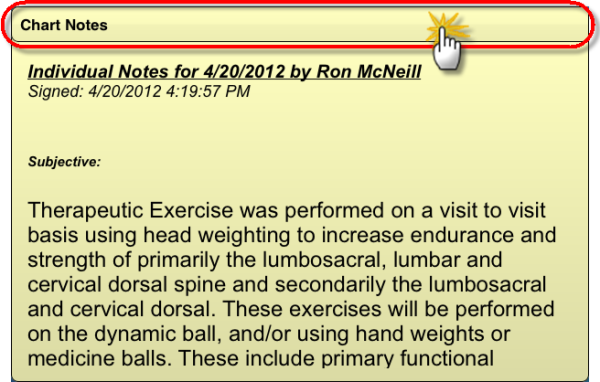
- Drag dates to scroll to your desired chart note.
- Tap a date to view chart notes for that date.
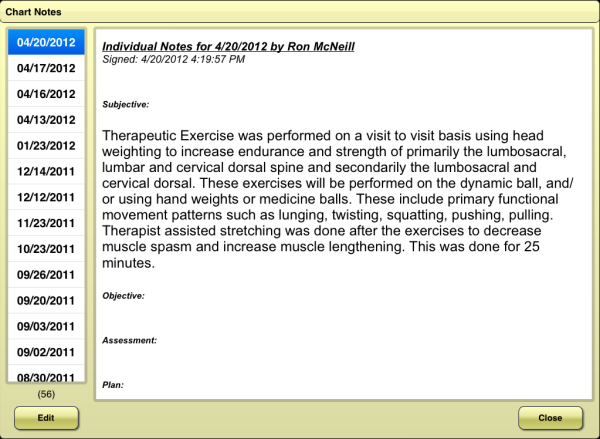
- Drag the chart note to scroll through the text.
Edit a chart note
- Select the chart note you wish to edit.
- Tap Edit in the lower-left corner. The Chart Note Editor appears.
NOTE:
If you make changes to a previously signed chart note, you must re-sign it before saving.
Delete a chart note
- Select the chart note you wish to edit.
- Tap Edit in the lower-left corner. The Chart Note Editor appears.
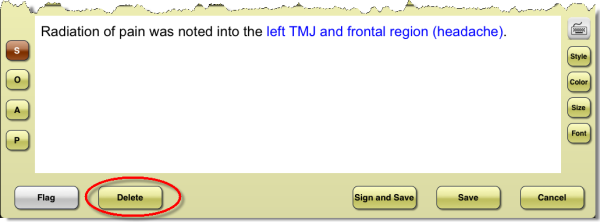
- Tap Delete below the chart note.
NOTE:
You cannot delete a signed chart note.
