Configuration Settings
Tap the Configuration icon in the main application window to open the Settings window.

Tap one of the our configuration menus in the Settings window to adjust options.
Tap the numerical option values to adjust them.
Tap to adjust the default display view in Provider/Room Events Setup.
Tap the Appointment Request Polling switch to enable or disable appointment request polling.
Tap the button that corresponds to the Schedule Book buttons you want to be available by default (iPad or PC).

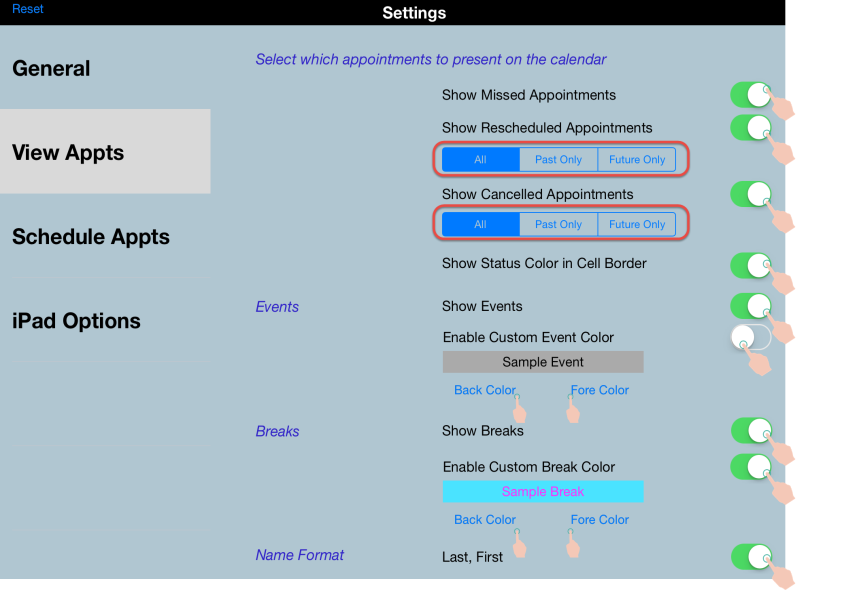
Tap the appointment, events and breaks switches to enable or disable the corresponding options.
Tap to adjust the timeframe for rescheduled and canceled appointment display.
Tap to adjust custom event and custom break back color and fore color.
Tap the Name Format switch to adjust the order of appearance for patient last name and first name.
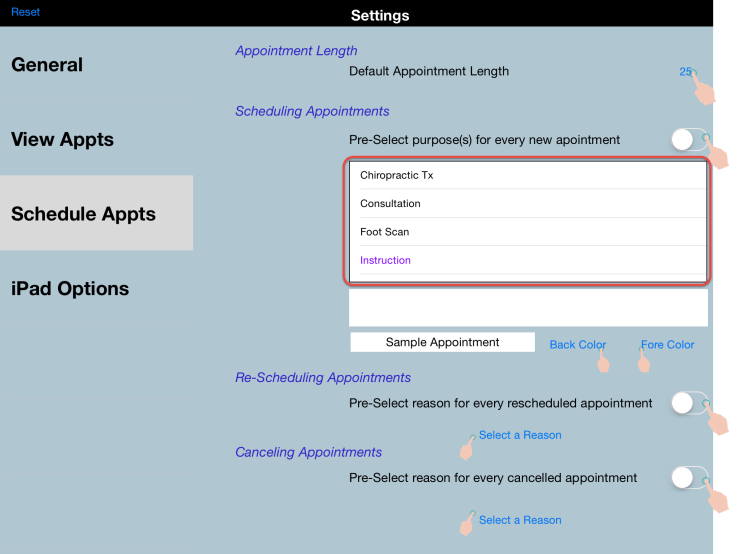
Tap the numerical Default Appointment Length value to adjust it.
Tap the switches to enable and disable pre-selection options.
Tap to select purposes, reasons and colors.
Tap the switches to enable or disable each option.
Sync with Apple Calendar (iCal) application
Enable the Export to iCal Button to select the specific appointment and event information to sync with an Apple Calendar (iCal) calendar account of your choice.
- Tap the Configuration icon on the main CTM Scheduler application window.
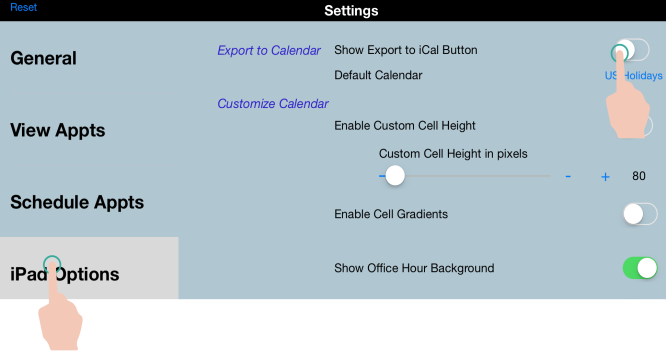
- The software will open the Settings window. Tap iPad Options.
- Tap the Show Export to iCal Button switch to enable an Export to iCal button for your appointments. You will use this enabled button to sync appointments with the calendar you set up as your default sync calendar.
- Sync your calendar.
- Open an appointment and click the [->.
- In the confirmation window that asks to access your calendar, click OK.
- Close and reopen the CTM Scheduler app.
- Tap the calendar name to select a new default sync calendar if you wish.

- Swipe to adjust the schedule view cell height.
- Tap to customize the background color for office hours as shown in the schedule view.
