Configuring Your Charges
The Charges screen can be accessed by
- Checking out a patient by clicking the "Charges" button on the Appointment Check Out screen.
- Selecting New > Charge from the patient ledger
Click the "settings" gear in the top right-hand corner of the Charges screen to configure the buttons on the charges screen to display five different categories of charges, and the treatments associated with each.
To configure your Charges buttons:
- Click the "Charges" button on the Appointment Check Out screen or from the ledger
- Click the "settings" gear in the top right-hand corner of the Charges screen.
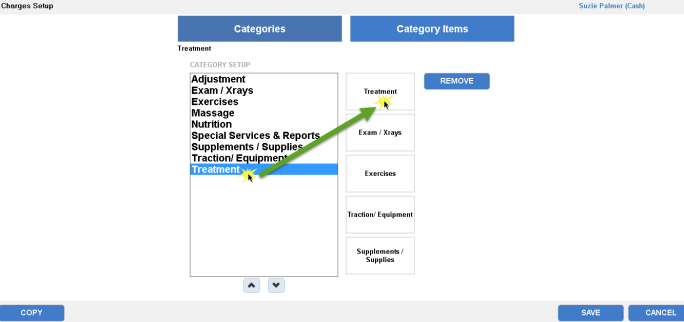
- Select the "Categories" button at the top of the set up screen.
- Select a category from the list.
- Click on a blank button to the right of the list to assign that category to that button. To remove a button assignment, click on that button and click the "Remove" button. Add or edit categories in List Maintenance.
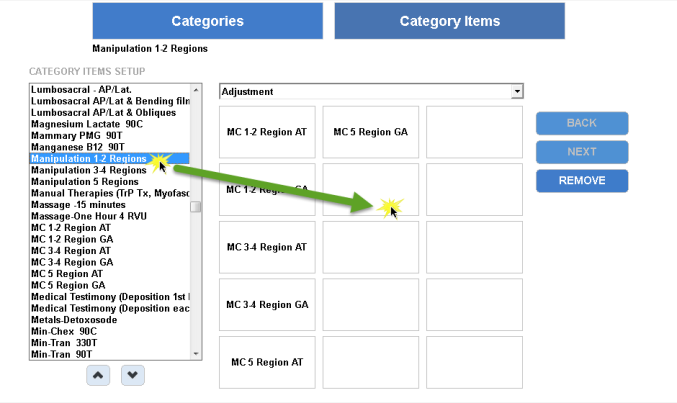
- To assign items to your categories, select the "Category Items" button at the top of the screen.
- Select a category item from the list, and then click a button to assign that item to that button. You can assign up to 30 items to each category. To assign more buttons in a category than are viewable on the screen, click the "Next>>" button. To remove a button assignment, click that button and click the "Remove" button.
IMPORTANT: Removing a button will cause the remaining buttons to shift up and fill that space. To replace a button, select a new charge from the list and override the existing button by clicking on top of it.
Copy Charge Hot Buttons
You can also copy another user’s categories and buttons.
- Select a provider or user from the Select user to copy from drop-down menu.
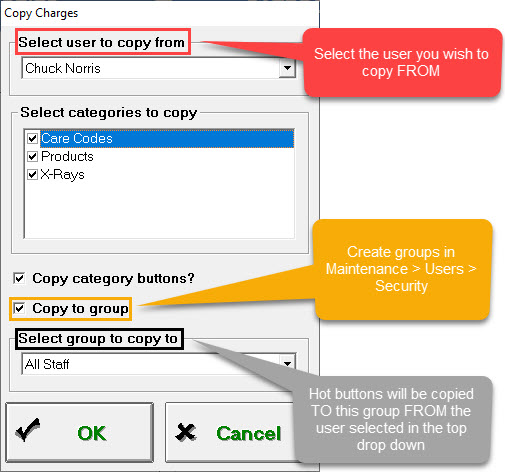
- Select categories from the Select categories to copylist.
- Select the "Copy category buttons" checkbox to copy both the categories, and their associated hot buttons.
- If copying Hot Buttons to a group, select the group in the drop down menu. Groups are created in Maintenance> Users > Security.
- When finished, click OK.
- If copying to a group that includes a user that already has hot buttons created, you will be alerted and asked if you'd like to proceed:
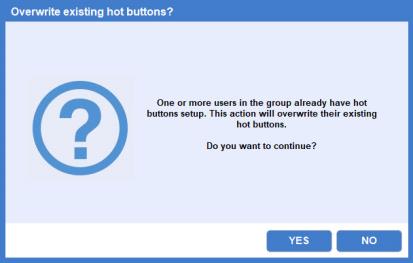
- If copying to a group that includes a user that already has hot buttons created, you will be alerted and asked if you'd like to proceed:
-
Then click Category Items button to review (and edit as necessary) the hot buttons that were copied over.
IMPORTANT: The Copy feature copies FROM another user TO your unique login or the selected group. If you copy from a user who has blank buttons, any settings you have will be replaced with blank buttons. Ensure that the user you are copying from has their hot buttons set up before you copy from them.
NOTE: If you already have a category identical to the category you are copying from another user, copying the buttons from this category overwrites the category buttons you currently have assigned to this category.