Patient Access
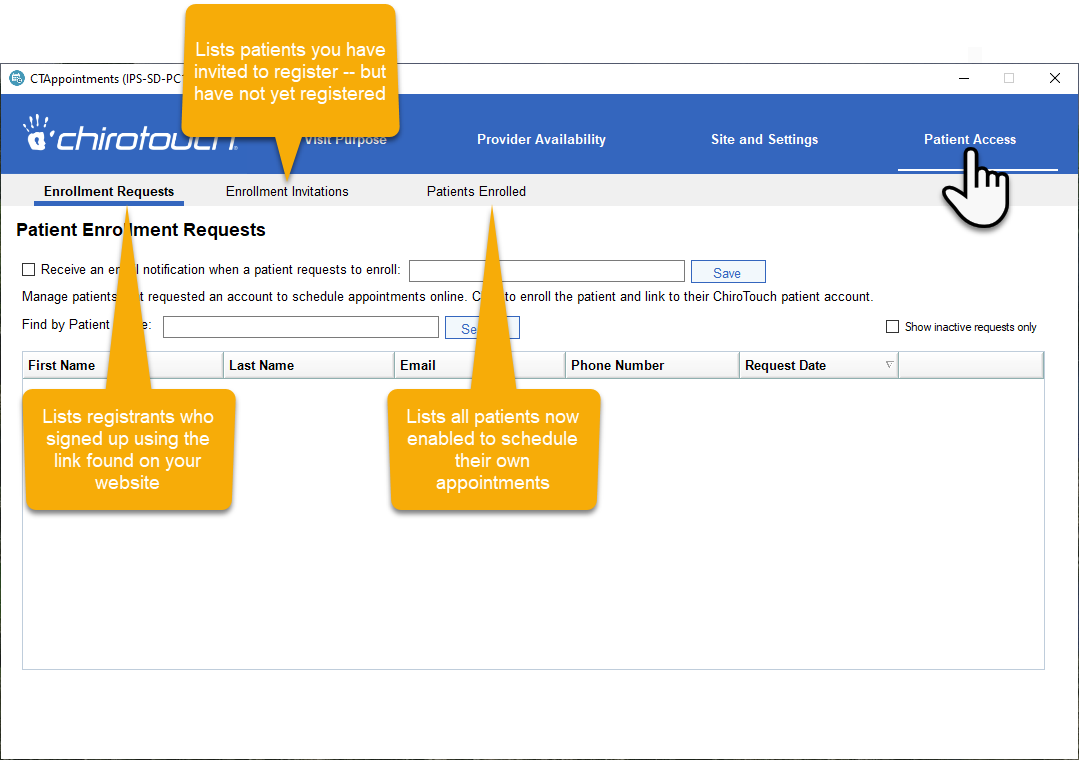
Once all settings are in place, you can begin inviting patients and managing enrollment. It has three sections:

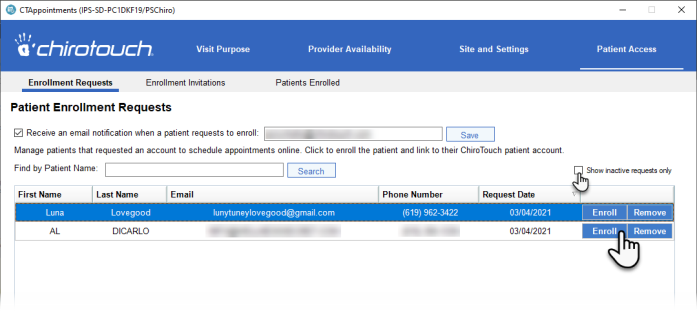
This section lists anyone who has registered using the Online Appointments link on your web site. You can opt to receive an email when anyone registers via your web site. CTAppointments cannot determine if the web visitor is already a patient. Therefore, you must review and evaluate the registrants on a case by case basis.
If you determine that a registrant is a patient of yours, you can link them to their account in ChiroTouch manually, and the patient will then be able to log in and book their own appointments. Their name will also be moved to the Patients Enrolled list.
See Enrolling Online Requesters for further information.

This section lists all patients to whom you have sent invitations but have yet to respond to the email sent and activate their accounts. It also provides a tool for inviting patients either individually en mass. From this list you can search for a specific patients, resend invitations, or delete invitations.
IMPORTANT: In order to for to be able send an invitation, the patient must have an email address and have given consent to receive emails from your practice.

Creating Invitations
Invitations are sent as emails to your patients. Each email contains the invitation wording plus a link to your Online Registration site where the patient can complete their registration by creating their password.
See Inviting Patients to Enroll for further information.
Resending Invitations
Click the Resend button for any patient you want to send another invitation. This will resend the invitation email and update the invitation date in the list. One reason for doing this could be that the patient informs you they have not received the first invitation for whatever reason.
After you click Resend you will see this confirmation message, which includes the name of the patient and their email address. To complete the resend process, click Yes.

Removing an Invitation
Click the Remove button for any patient you want to remove from the invitation list.
After you click Remove you will see this confirmation message. To complete the removal of the invitation, click Yes.

NOTE: This action also disables the Online Appointments account created for the patient. If the patient were to click the link in the invitation email after you have removed the invitation here, they would see a message on the site stating that the invitation is no longer active.
When an Incorrect Email Address is Discovered
Should you discover that an invited patient's email address is incorrect, this procedure must be followed to update the invitation:
- Update and save the patient's email address in the Front Desk.
- Remove the original invitation as described above.
- Send a new invitation to the patient as described on this page.
IMPORTANT: You cannot "resend" the original invitation after changing the patient's email address. Also, you cannot send a new invitation via the Front Desk or Scheduler. In this situation, new invitations must be sent through CTAppointments.
This is a list of all patients enabled to book their appointments online. This list also lets you search for specific patients change the patients' account linking if necessary, or delete their CTAppointments account.
To quickly view a patient's account link, click the "+" button to the left of their row. This will expand their information to display which practice account they're linked to:

Changing Patient Account Linking
CTAppointments accounts can be re-linked to other patient accounts, or linked to multiple patient accounts, as needed.
See Editing Enrolled Patients for further information.
Removing a Patient from Enrollment
Click the Remove button for any patient you want to permanently remove from CTAppointments. Reasons for doing this might include a patient needing to update their email address (which requires removal of the existing account followed by sending of a new invitation), or they simply are no longer a patient of your clinic.
After you click Remove you will see this confirmation message. To complete the removal of the account, click Yes.
