Insurance
To edit a patient’s insurance information, click Insurance on the Patient Management screen.

This screen displays all insurance policies for the patient. The first tab is the primary policy, the second is the secondary policy, and so on.

- Click Setup.
- In the Default Billing Form drop-down box, select "CMS-1500 (02-12)".
- Click Close.
- Click Add. The Add Insurance Company dialog appears.
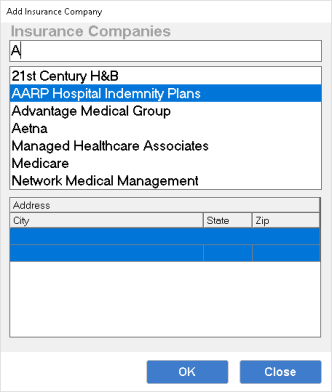
- Select an insurance company from the list and click OK.
NOTE:
To add a new insurance policy to the available list here, add the policy in the Payor section of the Maintenance application.
- Click OK.
In the Policy Information screen of the insurance policy, enter the following information in the fields provided.
- Click on the tab associated with the policy to be removed.
- Click Remove to remove this policy. A dialog box appears asking you to confirm this removal. Click Yes to delete the policy.
- Click Claim History. The Claim History dialog box appears.
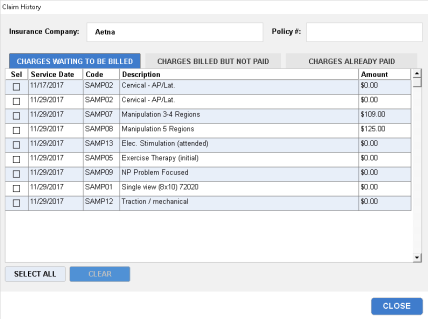
- Click the Charges waiting to be billed tab to select and clear any charges to be removed from billing. Select charges to remove, and click Clear. A confirmation dialog box appears asking you to confirm this charge removal. Click Yes to confirm this action.
-
Click the Charges billed but not paid tab to view pending charges. You can select to clear charges, re-print charges, export charges, or print a tracer.
- Select All - Click this button to select all the charges in the list. This is useful if you would like to clear all charges from billed but not paid and set them all back to waiting to be billed status.
- Clear - Select charges to remove, and click Clear to clear these charges. A confirmation dialog box appears asking you to confirm this charge removal. Click Yes to confirm this action. Clearing a charge moves it back to a waiting status.
- Re-Print – Select charges to re-print, and click Re-Print. A second dialog box appears asking you to select your billing form. Select a form from the list and click OK. A dialog box appears asking if you would like to print this form. Click Yes to print the form, or click No to cancel this action.
- Export – Select the charges you want to export, and click Export. A second dialog box appears asking you to select your billing form. Select a form from the list and click OK. A dialog box appears asking if you would like to export this form. Click Yes to export this form, or click No to cancel this action. If you selected yes, the Choose Export dialog box appears.
- Select an export type from the list, and click OK.
- The Select export file dialog box appears. You may select a preexisting claim file and append this claim to it, overwrite the existing claim file, or create a new claim file.
- Click Open.
- If you are appending your new claim file to an existing claim file, a dialog box appears asking you whether you would like to append or overwrite the old claim file. Click Append to add your new claim to the bottom of your old claim file, or click Overwrite to overwrite your old claim file.
- If you are creating a new claim file, a dialog box appears asking whether you would like to create the file. Click Yes to create your new claim file.
- The Claims Export dialog box appears to confirm that the claim file was imported to your clearinghouse successfully. Click Yes to confirm that the claim file was imported successfully, or click No to re-export the claim form.
- Tracer – Select the charges for which you would like to print a tracer, and click Tracer. A dialog box appears asking if you would like to print this tracer. Click Yes to print the tracer, or click No to cancel this action.
- Click the Charges already paid tab to view charges that have been paid. You may clear paid charges using Clear on this screen if you have not accepted assignment from this patient. To clear paid charges and re-bill them to an insurance company when choosing to change your accept assignment designation, remove the check mark from the Accept Assignment box and . Don't forget to review the policy setup once these actions are complete to ensure the insurance is set up properly for future billing.
Click Close to close the Claim History dialog box.
Click Notes to add a note. For instructions on creating notes, Patient Ledger Notes.
To change the order of insurance companies and re-assign them as primary, secondary, and so on:
- Click Set Policy Order.
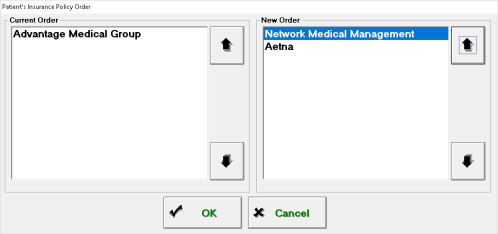
- In the Current Order field, click on insurance company names in the order which you want them assigned.
- Click OK to reassign the insurance companies. If you make a mistake, click Cancel and then click Set Policy Order again to start over.
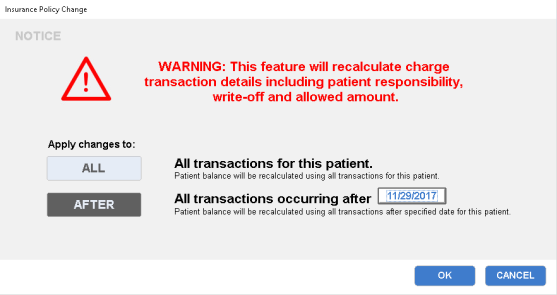
- Click Update Pat Balance in the lower-right area of the screen. The Insurance Policy Change dialog box appears. Be warned that updating a patient balance recalculates charge transaction details. In this dialog box, you can choose to apply changes to all transactions for this patient, or all transactions occurring after a specified date.
- Click the date button to open a calendar and edit this date.
- Click OK to recalculate charges. A dialog box appears asking you to confirm this recalculation. Click Yes to recalculate the patient’s balance.
- Select the policy you want to hide by clicking the tab at the top.
- Click Hide Policy.
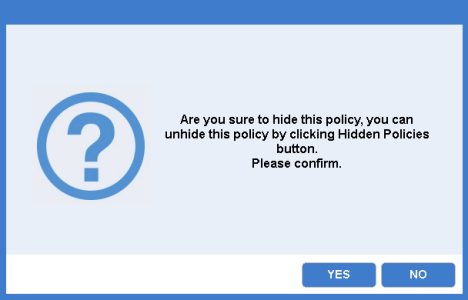
- A confirmation message appears asking if you're sure you want to hide this policy. Click Yes to proceed or No to cancel and keep the policy visible.
- The policy is hidden and the tab is no longer displayed. After a policy is hidden, it can be restored from the Hidden Policies screen. See Insurance
- Click Hidden Policies.
- Check the box for the policy you want to restore.
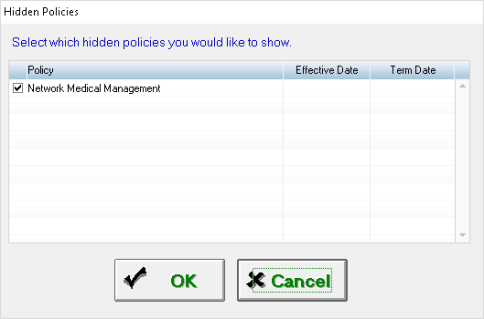
- Click OK.
