Inventory
The Inventory Application tab in the Inventory application allows users to manage inventory items and inventory categories, run reports, and manage vendors.
 Manage Vendors
- Click the Inventory icon from the Launcher to open the application.

- Click Vendor List from the Vendors group in the ribbon to view all vendors in your system in a list.
- Click a column header to sort the Vendor List.

 Add Vendor
- Click the Inventory icon from the Launcher to open the application.

- Click Add Vendor from the Vendors group in the ribbon.
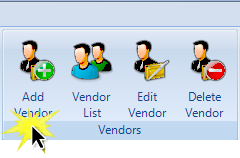
- Enter vendor information in the Add Vendor dialog box. Click OK.
 Edit Vendor
- Click the Inventory icon from the Launcher to open the application.

- Click Vendor List from the Vendors group in the ribbon.
- Select a vendor and click Edit Vendor from the Vendors group in the ribbon. The software will open the Edit Vendor dialog box.
- Edit vendor information and click OK.
 Delete Vendor
- Click the Inventory icon from the Launcher to open the application.

- Click Vendor List from the Vendors group in the ribbon.
- Select a vendor and click Delete Vendor from the Vendors group in the ribbon.
- The software will open a dialog window asking you to confirm your choice. Click Yes.
 Manage Inventory Items
- Open the Inventory application or click the Inventory tab to view all inventory items in your system in a list.
- Click a column header to sort the Inventory Item List.

 Add New Inventory Item
IMPORTANT:
IMPORTANT: Add at least one vendor to your system before adding inventory items to the Inventory Item List.
- Click New Item from the Items group in the ribbon.
- Click
 next to the Name field. The software will open the Select Charge Items dialog window listing all your Charge Items from the Maintenance application in a list.
Click the charge item that corresponds to the inventory item you wish to add to the Inventory application. Click OK. - N O T E
NOTE: Add new charge items in the Maintenance application. - Select the item category and preferred Vendor from the drop-down menus.
- N O T E
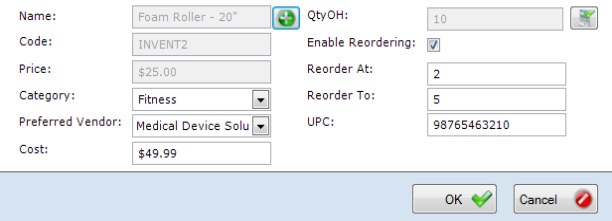
NOTE: Add new inventory item categories if the software does not contain all needed categories. You can also add a new vendor to your system. - Enter the item cost (this refers to the sale price of the item at your practice).
- Enter the quantity on hand in the QtyOH field.
- Check the Enable Reordering box to list the item on the Reordering Summary when its quantity on hand (QtyOH) reaches a threshold that you set.
- Enter the reorder quantity on hand amount in the Reorder To field.
- Enter the quantity on hand threshold in the Reorder A: field.
- Click in the UPC field and either scan or enter the item UPC from its barcode.
- Click OK.
 Manage Inventory Item Categories
Your software contains a list of generic inventory item categories that you can edit or add to.
- Click Inventory Categories from the Inventory General group in the ribbon.
- To rename category, click a category in the list and click Edit. Click Done to save your changes.
- To delete category, click a category in the list and click Delete. Click Yes to confirm your choice.
- To add category, click New and type the new category name. Click Add.

 Edit Inventory Item
- Click the Inventory icon from the Launcher to open the application.

- Click Inventory Item List from the Items group in the ribbon.
- Select a vendor and click Edit Item from the Items group in the ribbon.
- Edit item information in the Edit Item dialog box fields as needed and click OK.
 Delete Inventory Item
- Click the Inventory icon from the Launcher to open the application.

- Click Inventory Item List from the Items group in the ribbon.
- Select a vendor and click Delete Item from the Items group in the ribbon.
- The software will open a dialog window asking you to confirm your choice. Click Yes.
 Adjust Inventory Quantity On Hand
- Click the Inventory icon from the Launcher to open the application.

- Click Inventory Item List from the Items group in the ribbon.
- Select an item and click Adjust Inventory from the Items group in the ribbon.
- Enter the change quantity, select a change date, select an adjustment reason, and enter comments in the Inventory Adjustment dialog box.
- Click OK.
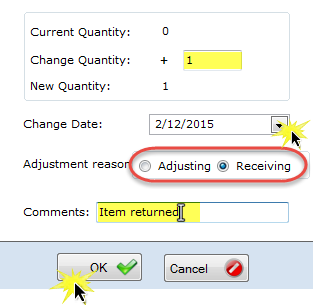
- The software will display the revised inventory item quantity on hand in the QtyOH column in the Inventory Item List.
 Print Inventory List
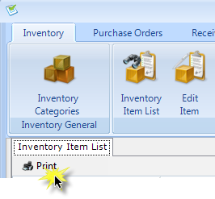
You can print your inventory list at any time by clicking Print in the upper left-hand corner of the inventory screen.
 Reports
Activity Detail
The Activity Detail report reports all audited Inventory activity.
- Click Activity Detail from the Reports group in the ribbon.
- Set the start and end date for the report in the Activity Detail Report dialog box and click OK.
- Print or export the report to PDF or Excel.
Reordering Summary
The Reordering Summary lists the inventory items with quantity values that fall below the reorder threshold you configure. To access it, click Reordering Summary from the Reports group in the ribbon. When the report opens, use the buttons at the top to print or export to Microsoft Excel or PDF.
Cost of Sale
The Cost of Sale report shows all items sold within a date range, including the price and cost.
- Click Cost of Sale from the Reports group in the ribbon.
- Set the start and end date for the report and click OK.
- Print or export the report to PDF or Excel.
Inventory Level
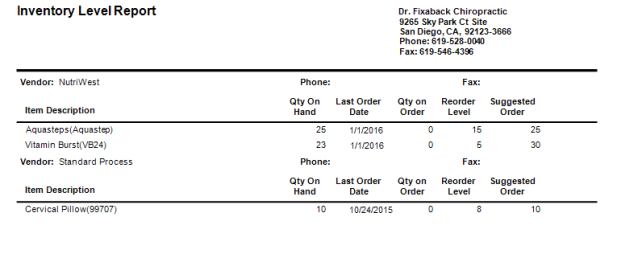
The Inventory Level report provides inventory levels by product description and includes: Quantity on Hand, Last Order Date, Quantity on Order, Reorder Level, and Suggested Order.
- Click Inventory Level from the Reports group in the ribbon.
- Select the desired vendor(s) from the Select Vendors list and click OK.
Inventory Status
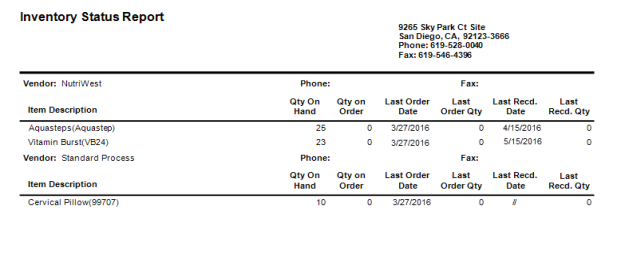
The Inventory Status report provides inventory status by product description and includes: Quantity on Hand, Quantity on Order, Last Order Date, Last Order Quantity, Last Received Date, and Last Received Quantity.
- Click Inventory Status from the Reports group in the ribbon.
- Select the desired vendor(s) from the Select Vendors list and click OK.
