Self Check-In Tab
Use the Self Check-In tab to assign a magnetic strip card, personal ID number, or barcode to the patient.
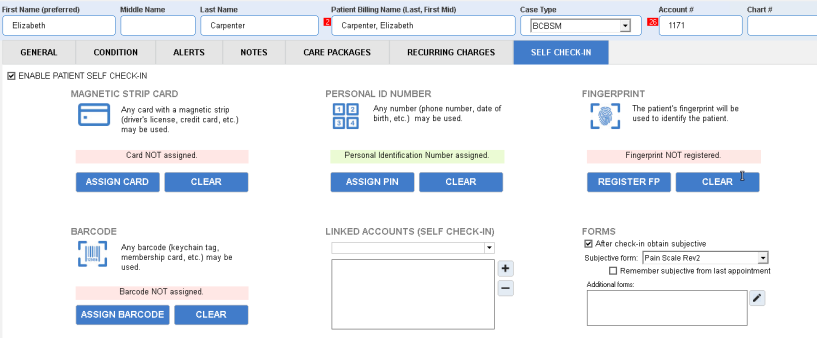
Enable Patient Self Check-In
Check the Enable Patient Self Check-In box.
Assign a magnetic strip card to the user
Click Assign Card. A dialog box appears prompting the patient swipe their card. 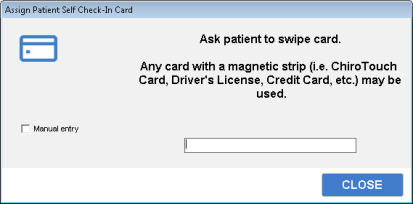
Assign a barcode to the patient
Click Assign Barcode. Have the patient scan a barcode. Any barcode may be used, such as a keychain tag or a membership card.
Manually assign a barcode to a patient
- Click the Assign Card button in the Magnetic Strip Card area.
- Check the Manual Entry box, and then enter the card value in the field provided.
- Press enter when finished. The card value is assigned to the patient, and they may use this value to check themselves in when arriving for an appointment.
Assign a pin to the patient
Click Assign Pin. Enter a pin number for the patient, and press ENTER. The pin is assigned to the patient. 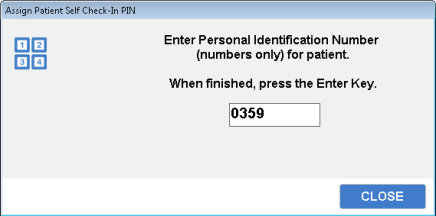
For information on acquiring additional hardware to support these sign-in methods, view the Integrated Technologies section of our Systems Requirements page.
You may also link accounts so that the same self check-in methods can be used for multiple patients. Linking accounts is an ideal feature for families.
Link accounts
- Select the drop-down menu in the Linked Accounts (Self Check-In) area of this screen.

- Select a patient to link to this account.
- Click Add.
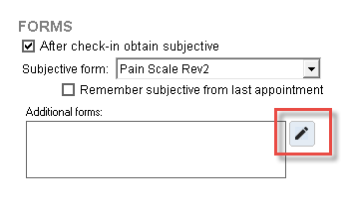
Assigning Forms at Check-In

Assign a subjective form
Select the After check-in obtain subjective option in the Forms section, and then select a subjective form from the Subjective form drop-down menu.
If you would like the system to remember the subjective from the last appointment, select Remember subjective from last appt.
NOTE:
The system will remember only the specified subjective, and that if the patient did not fill out the subjective on the last visit, the subjective will be empty.
Assign an outcomes assessment
- Select the After check-in obtain subjective option in the Forms section.
- Click Edit.
- Click the Outcomes Assessments tab.
- Click Add.
- Select an outcomes assessment. The following outcomes assessments forms are available:
- Headache Disability IndexHeadache Disability Index
- Back Bournemouth Questionnaire
- Health Status Questionnaire (HSQ-12)
- Health Status Questionnaire (Rand 36)
- Low Back Disability Questionnaire (Oswestry)
- Low Back Disability Questionnaire (Revised Oswestry)
- Low Back Pain Disability Questionnaire (Roland-Morris)
- Lower Extremity Functional Scale
- Neck Bournemouth Questionnaire
- Neck Disability Index
- Oswestry Disability Questionnaire
- Oswestry Disability Questionnaire (Metric)
- Quadruple Visual Analogue Scale
- Upper Extremity Functional Index
- Configure your frequency options in the Display Form area.
- Click Save. Continue adding additional forms to the list.
- When you are finished, click Close.
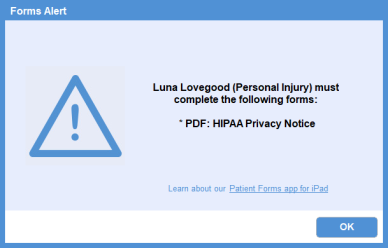
When a patient completes an outcome assessment at check-in (through either CT Sign-In or CTM Sign In), an alert will trigger in the Front Desk (Missed Alerts button).
In this section, you can also assign PDF forms for use with the CTM Forms app.
Assign a PDF form
NOTE: Unlike Outcome Assessments, PDF forms will not populate for the patient to fill out after sign-in. Once the patient has signed in, the Front Desk will be prompted with an alert reminding them which form to assign to the patient. The patient can fill out PDF's via the CTM Forms iPad application or by paper.
- Select the After check-in obtain subjective option in the Forms section.
- Click Edit.
- Click the PDF Forms tab.
- Click Add.
- Select a PDF form.

- Configure your frequency options in the Display Form area.
- Click Save. Continue adding additional forms to the list.
- When you are finished, click Close.
NOTE:
For detailed instructions on customizing PDF forms, see our how-to guide, Customizing Your PDFs.
Once the patient is manually moved from the Today's Appointment column to the Patient's Checked In column in the Patient Flow Screen, and alert will trigger for the staff reminding them of the PDF to hand to the patient. This can be done by using the CTM Forms iPad application or by paper. If the patient is automatically checked into the middle column upon signing in, this alert will be missed and will show in the missed alerts button.